|
Home
 Our
Camping Experience Our
Camping Experience
 FAQ
Page FAQ
Page
 Guest
Book Guest
Book
Natasha Pages:
 About
Natasha About
Natasha
 Natasha
Pictures Natasha
Pictures
 How
Could You? How
Could You?
 Doggie
Dictionary Doggie
Dictionary
 Camping
With Your Dog Camping
With Your Dog
Camp Site Pages:
 Our
Trips Our
Trips
 Fort
Wilderness Fort
Wilderness
 DC
Camping DC
Camping
Camper Pages:
 Our
Camper Our
Camper
 Tow
Vehicle Tow
Vehicle
 Site
Statistics Site
Statistics
Modification & Service:
 Detachable
Power Cable Detachable
Power Cable
 Modified
Drawers Modified
Drawers
 Mirror Mirror
 Single
Drain System Single
Drain System
 Drill
Lift System Drill
Lift System
 LED
Light System LED
Light System
 Accumulator
Tank Accumulator
Tank
 Florescent
Light Florescent
Light
 Bike
Rack Bike
Rack
 Outside
Shower Outside
Shower
 Batteries
in a PU Batteries
in a PU
 Bed
End Tray Bed
End Tray
 Battery
Charge Cable Battery
Charge Cable
 Stove
Counter Stove
Counter
 AC
Brace AC
Brace
 WH
Wind Guard WH
Wind Guard
 RV
Plug @ Home RV
Plug @ Home
 Awning
Base Awning
Base
 12v
Power Adaptor 12v
Power Adaptor
 Battery
Meter Battery
Meter
 Water
Level Indicator Water
Level Indicator
 Tongue
Jack Service Tongue
Jack Service
 Our
Bunk Our
Bunk
Information:
 Camping
With Your Dog Camping
With Your Dog
 Camping
Checklist Camping
Checklist
 Dry
Camping Dry
Camping
 Pop
Up Brakes Pop
Up Brakes
 Break
Away Switch Break
Away Switch
 Campsite
Safety Campsite
Safety
 Towing
& Hitch Info Towing
& Hitch Info
 Sway
Information Sway
Information
 Gray
Water Gray
Water
 Porta
Potti Porta
Potti
 RV
Air Conditioning RV
Air Conditioning
 Pop
Up Tires Pop
Up Tires
 Changing
a Flat Tire Changing
a Flat Tire
 Pop
Up Refrigerator Pop
Up Refrigerator
 Camp
Site Power Camp
Site Power
 Trailer
Dolly Trailer
Dolly
 Folding
Camp Table Folding
Camp Table
 Awning
Base Awning
Base
 Level
Your PopUp Level
Your PopUp
 Winterize
Your PopUp Winterize
Your PopUp
 Spring
Set Up Spring
Set Up
 Camp
Cooking Accessories Camp
Cooking Accessories
 Buying
a Used PopUp Buying
a Used PopUp
 Message
Board Shorthand Message
Board Shorthand
Camping Links:
 PopUpTimes PopUpTimes
 Camping
Links Camping
Links
 Camping
Club Links Camping
Club Links
 Manufacturer
Links Manufacturer
Links
GSD Links:
 MidAtlantic
GS Rescue MidAtlantic
GS Rescue
 GS
Rescue of LA GS
Rescue of LA
 Virginia
GS Rescue Virginia
GS Rescue
 Flying
Dog Press Flying
Dog Press
|
Gray Water Drain
All photos are thumbnails,
click on a picture to see a larger version
As with all great modifications, there has to be
inspiration to get it going. I admit it, for this one I left tall
the inspiration as well as planning to other folks. This was completely
plagiarized from ozandus,
a regular contributor on many web boards devoted to
pop up camping The reason behind it is
simple, most pop ups come equipped with a drain that is 1 1/2 inches, the
the manufacturers supply an adaptor to change that large opening down to
the size of a garden hose. Let me tell you, without pressure behind
it water flows very slowly in a garden hose using only gravity to make it
move.
 |
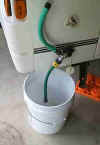
Here was my first attempt to get the
water moving a little quicker. Putting a "Y" at the
adaptor this configuration allows air into the system making the
water flow a little easaier. |
 |
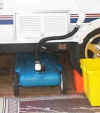
Here is my new system. The
smallest pipe I now use is 1" PVC. |
 |
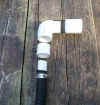
The parts for the trailer end of the
new hose are:
-
1 1/2" PVC fitting (female thread on one side
and smooth on the other side. The threaded side screws onto
the drain fitting on the side of the pop up
-
A 90 degree "street elbow" On one
side of this elbow it fits into the smooth side of the first adaptor
-
A reducing fitting from 1 1/2" to 1"
PVC. This is inserted into the bottom of the street elbow.
-
A 4" section of 1" PVC pipe. This is
inserted into the reducing fitting.
-
Corrugated sump pump hose cut down to about 4
feet. This hose is held on the PVC with a pipe strap.
|
 |
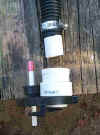
The parts at the gray water container
end are:
-
The other end of the corrugated sump pump hose.
-
A 4" section of 1" PVC pipe inserted
into the sump pump hose.
-
A reducing fitting from 1 1/2" to 1"
PVC. The 1" PVC is inserted into this fitting.
-
A 1 1/2" male threaded adaptor. The
reducing fitting is inserted into this adaptor.
-
A 4" sewer/gray water cap. This is a
standard RV part. The one I chose has a standard garden hose
fitting offset to one side of the cap. Barker manufacturing makes
a water level indicator for my 22 gallon
gray water tank and I insert that indicator here.
|
|
|
|
The next part of this project will be to connect the
shower drain that is on the rear of the pop up to the sink drain shown
here. This will allow me to use the 22
gallon gray water tank for both drains as well as move the tank
around to the rear of the pop up. But, I assume I will always need
several configurations of drain hoses to account for differences in
campgrounds and/or the ground I find a a camp site. |
|
Revised: May 08, 2007
|