|
Home
 Our
Camping Experience Our
Camping Experience
 FAQ
Page FAQ
Page
 Guest
Book Guest
Book
Natasha Pages:
 About
Natasha About
Natasha
 Natasha
Pictures Natasha
Pictures
 How
Could You? How
Could You?
 Doggie
Dictionary Doggie
Dictionary
 Camping
With Your Dog Camping
With Your Dog
Camp Site Pages:
 Our
Trips Our
Trips
 Fort
Wilderness Fort
Wilderness
 DC
Camping DC
Camping
Camper Pages:
 Our
Camper Our
Camper
 Tow
Vehicle Tow
Vehicle
 Site
Statistics Site
Statistics
Modification & Service:
 Detachable
Power Cable Detachable
Power Cable
 Modified
Drawers Modified
Drawers
 Mirror Mirror
 Single
Drain System Single
Drain System
 Drill
Lift System Drill
Lift System
 LED
Light System LED
Light System
 Accumulator
Tank Accumulator
Tank
 Florescent
Light Florescent
Light
 Bike
Rack Bike
Rack
 Outside
Shower Outside
Shower
 Batteries
in a PU Batteries
in a PU
 Bed
End Tray Bed
End Tray
 Battery
Charge Cable Battery
Charge Cable
 Stove
Counter Stove
Counter
 AC
Brace AC
Brace
 WH
Wind Guard WH
Wind Guard
 RV
Plug @ Home RV
Plug @ Home
 Awning
Base Awning
Base
 12v
Power Adaptor 12v
Power Adaptor
 Battery
Meter Battery
Meter
 Water
Level Indicator Water
Level Indicator
 Tongue
Jack Service Tongue
Jack Service
 Our
Bunk Our
Bunk
Information:
 Camping
With Your Dog Camping
With Your Dog
 Camping
Checklist Camping
Checklist
 Dry
Camping Dry
Camping
 Pop
Up Brakes Pop
Up Brakes
 Break
Away Switch Break
Away Switch
 Campsite
Safety Campsite
Safety
 Towing
& Hitch Info Towing
& Hitch Info
 Sway
Information Sway
Information
 Gray
Water Gray
Water
 Porta
Potti Porta
Potti
 RV
Air Conditioning RV
Air Conditioning
 Pop
Up Tires Pop
Up Tires
 Changing
a Flat Tire Changing
a Flat Tire
 Pop
Up Refrigerator Pop
Up Refrigerator
 Camp
Site Power Camp
Site Power
 Trailer
Dolly Trailer
Dolly
 Folding
Camp Table Folding
Camp Table
 Awning
Base Awning
Base
 Level
Your PopUp Level
Your PopUp
 Winterize
Your PopUp Winterize
Your PopUp
 Spring
Set Up Spring
Set Up
 Camp
Cooking Accessories Camp
Cooking Accessories
 Buying
a Used PopUp Buying
a Used PopUp
 Message
Board Shorthand Message
Board Shorthand
Camping Links:
 PopUpTimes PopUpTimes
 Camping
Links Camping
Links
 Camping
Club Links Camping
Club Links
 Manufacturer
Links Manufacturer
Links
GSD Links:
 MidAtlantic
GS Rescue MidAtlantic
GS Rescue
 GS
Rescue of LA GS
Rescue of LA
 Virginia
GS Rescue Virginia
GS Rescue
 Flying
Dog Press Flying
Dog Press
|
|
Step By Step Anti-Freeze Installation
All photos are thumbnails,
click to see an enlarged version
|
 |
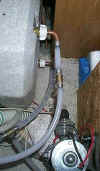
The photo to the left looks down into the
area occupied by the hot water heater and water pump of my Santa Fe.
Different makes and models may be set up in a different
configuration Take a moment to look at yours and you should be able
to parts and water flow of your system.
In mine the water pump is in the lower right corner of the photos ( the
round silver object). Attached to the side of it (the top of it in the
photo) is the water input.
The gray square object in the upper left of the photo is the hot water
heater. Note the two water connections (white knobs & clear
hoses). The lower one is the cold water input and the upper one is
the hot water output. |
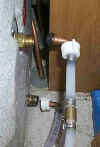
| As you do not want to fill your hot water
heater with antifreeze, you need to "bypass" the HWH in the
water system. Disconnect both the input and output hoses. The
photo to the right shows them disconnected.
Note: Before you do this make sure the
tank is completely empty of water or you will be cleaning up a lot of
water! The easiest way is to take this step only after removing and
inspecting the anode rod. |
 |
 |
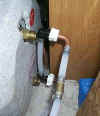
To the left you see the bypass hose that
Coleman supplied with the pop-up. If you did have one it can be
fabricated with a short piece of tubing/hose and two connectors.
This was the hardest part of my winterization project,
remembering where I put this hose. |
| Connect this bypass hose to the two hoses
disconnected form the HWH. Do not over tighten as all parts are
plastic and break easily.
You may want to make a run to Home
Depot and pick up 2 caps to close the hot water heater pipes.
Leaving them open all winter may invite small creatures to take up
residence in your hot water heater. I'm sure they will not taste that
good next camping season. Another option is to use plastic (bags or
wrap) to cover the two openings. |
 |
 |
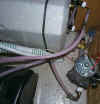
The photo to the left is what you want to see
when you are all done. Pink RV anti-freeze in all of the water
lines. Remember there are 2 ways to do this:
1. Replacing the water with an RV anti-freeze through the fresh water holding tank
2. Replacing the water with an RV anti-freeze pumped directly from the bottle
You can read about this on the main Winterizing Your Pop-Up
page.
I did mine by pumping directly from the bottle. If you compare
the photo to the left with the one at the top of the page you will see a
new adaptor attached to the input side of the water pump. This is a
"Y" valve designed for this purpose. It is also described
on the main Winterizing Your Pop-Up
page. |
|
|
Revised: May 08, 2007
|