|
Home
 Our
Camping Experience Our
Camping Experience
FAQ
Page
Guest
Book
Natasha Pages:
About
Natasha
Natasha
Pictures
How
Could You?
Doggie
Dictionary
Camping
With Your Dog
Camp Site Pages:
Our
Trips
Fort
Wilderness
DC
Camping
Camper Pages:
Our
Camper
Tow
Vehicle
Site
Statistics
Modification & Service:
Detachable
Power Cable
Modified
Drawers
Mirror
Single
Drain System
Drill
Lift System
LED
Light System
Accumulator
Tank
Florescent
Light
Bike
Rack
Outside
Shower
Batteries
in a PU
Bed
End Tray
Battery
Charge Cable
Stove
Counter
AC
Brace
WH
Wind Guard
RV
Plug @ Home
Awning
Base
12v
Power Adaptor
Battery
Meter
Water
Level Indicator
Tongue
Jack Service
Our
Bunk
Information:
Camping
With Your Dog
Camping
Checklist
Dry
Camping
Pop
Up Brakes
Break
Away Switch
Campsite
Safety
Towing
& Hitch Info
Sway
Information
Gray
Water
Porta
Potti
RV
Air Conditioning
Pop
Up Tires
Changing
a Flat Tire
Pop
Up Refrigerator
Camp
Site Power
Trailer
Dolly
Folding
Camp Table
Awning
Base
Level
Your PopUp
Winterize
Your PopUp
Spring
Set Up
Camp
Cooking Accessories
Buying
a Used PopUp
Message
Board Shorthand
Camping Links:
PopUpTimes
Camping
Links
Camping
Club Links
Manufacturer
Links
GSD Links:
MidAtlantic
GS Rescue
GS
Rescue of LA
Virginia
GS Rescue
Flying
Dog Press
|
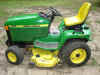
My John Deere 425
Tractor
Well, to really play on my new land, I really needed a new toy
- so here it is!
|
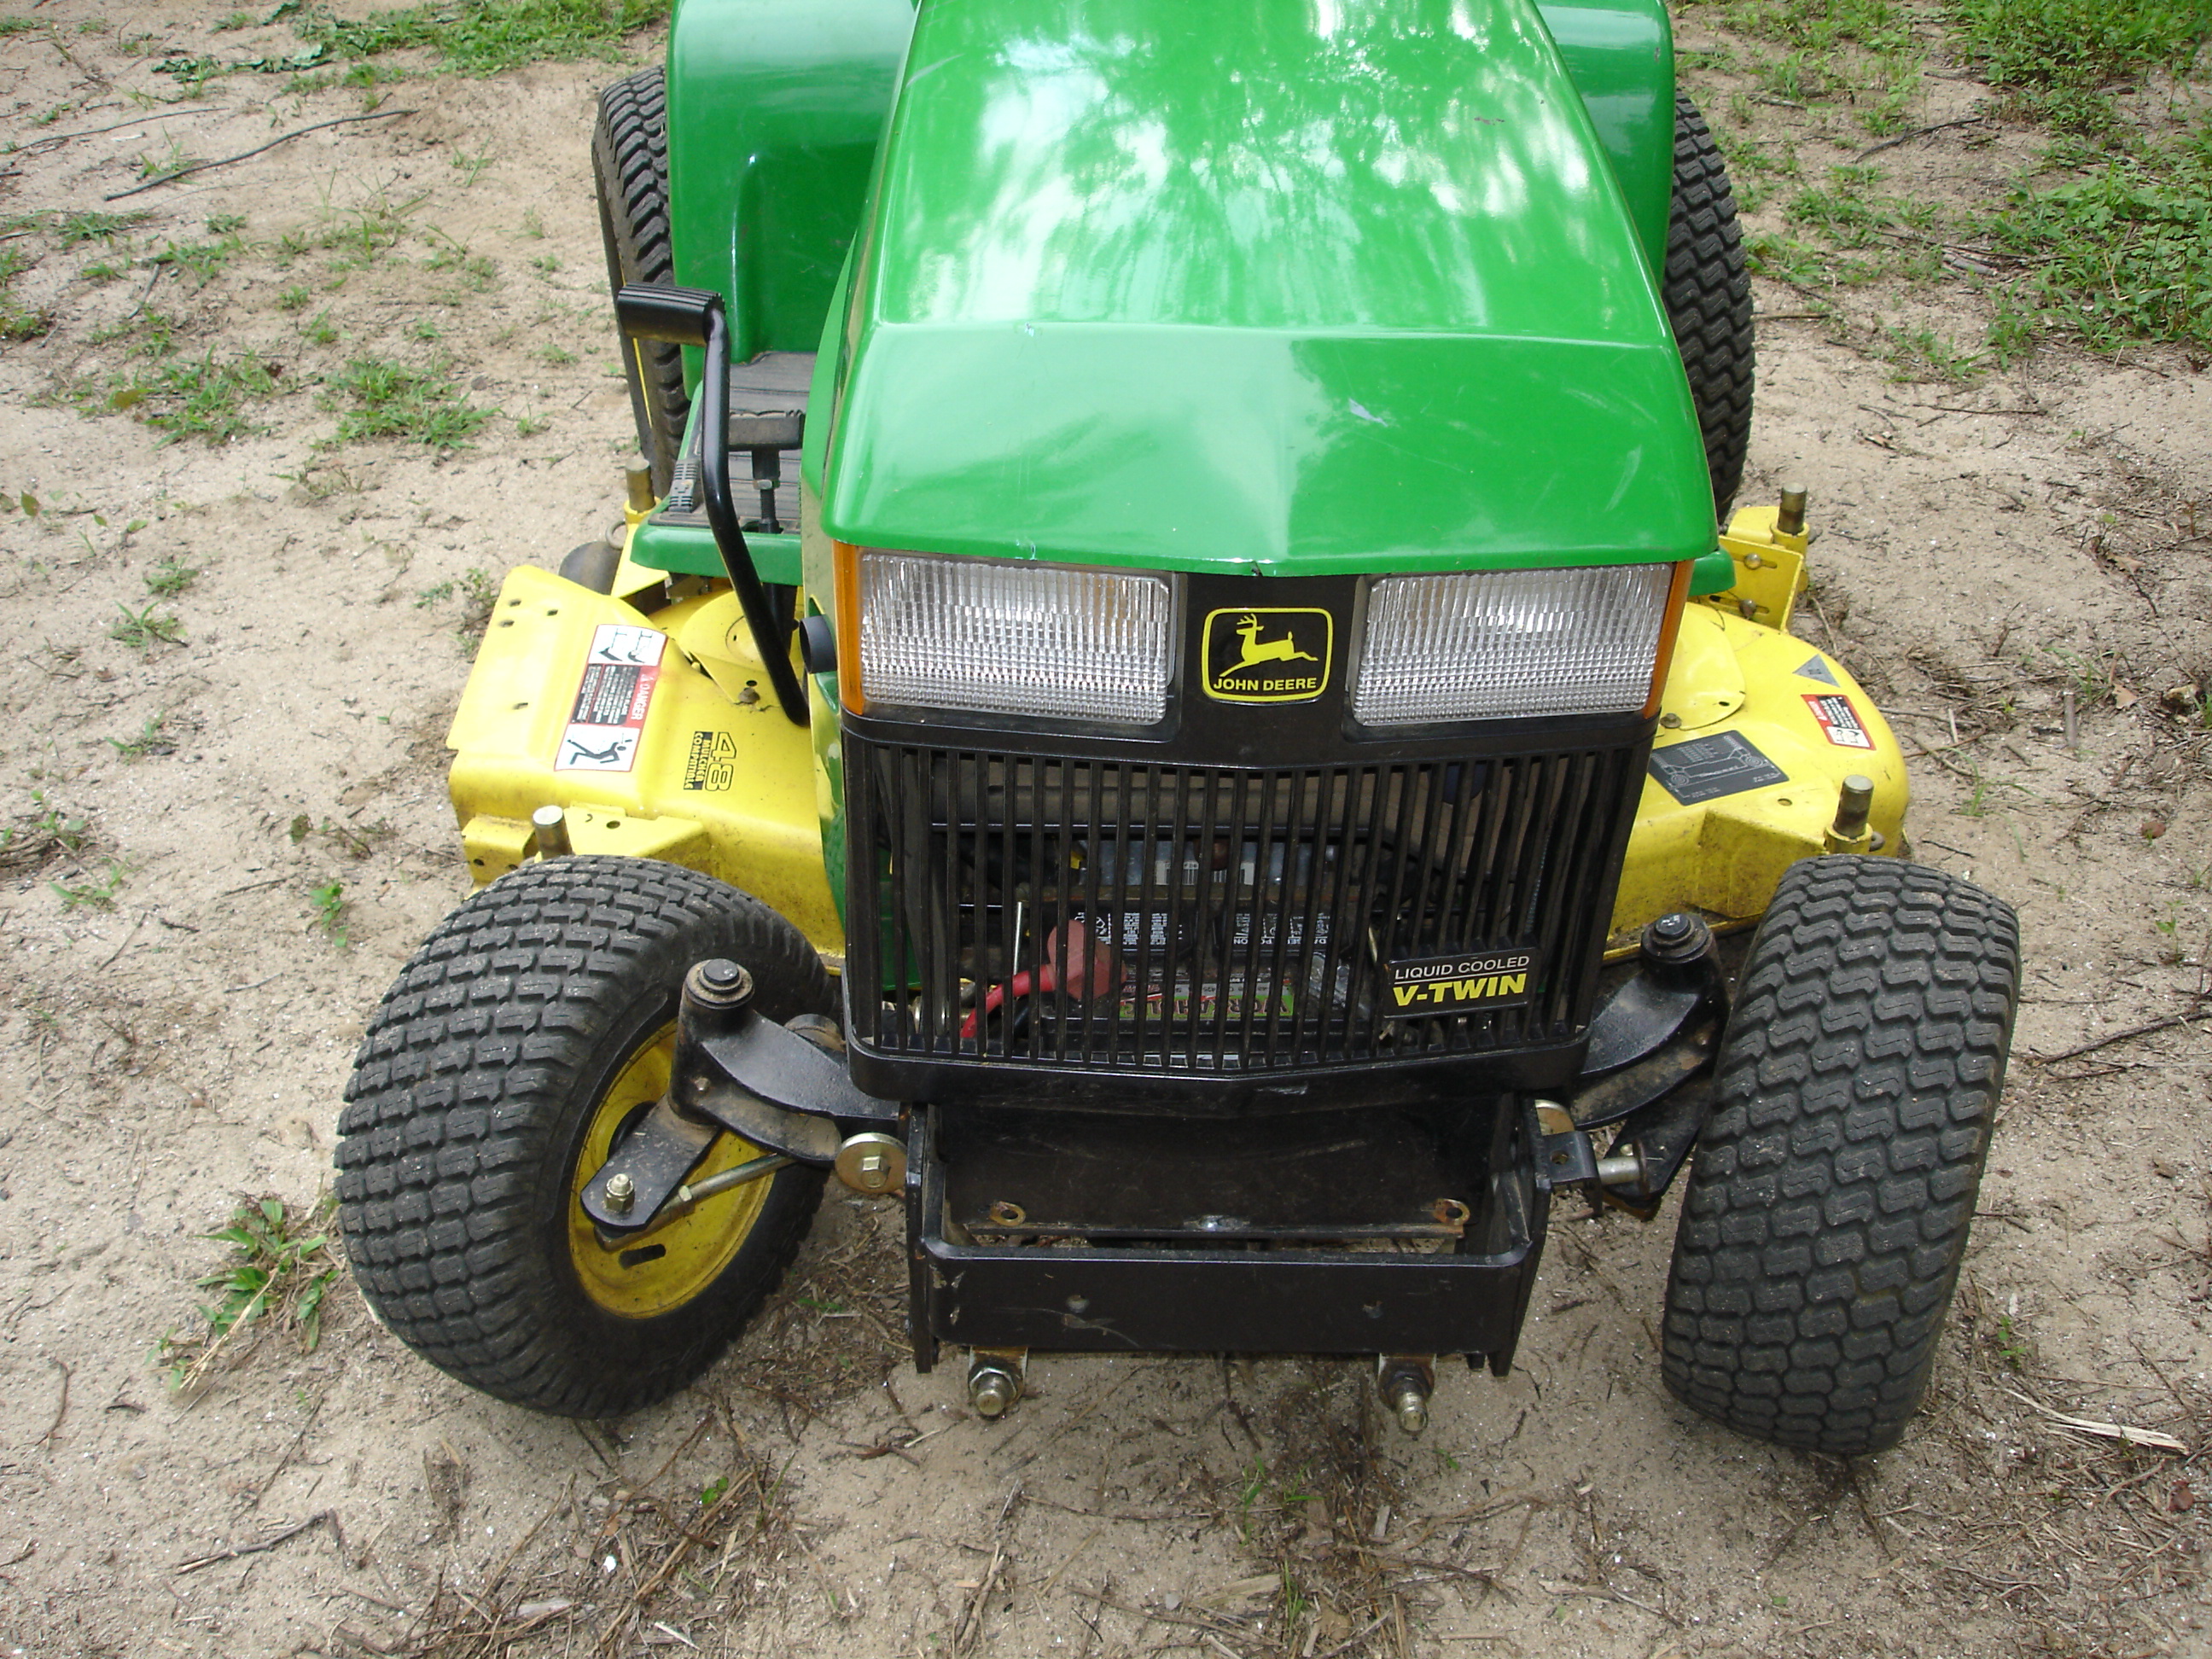
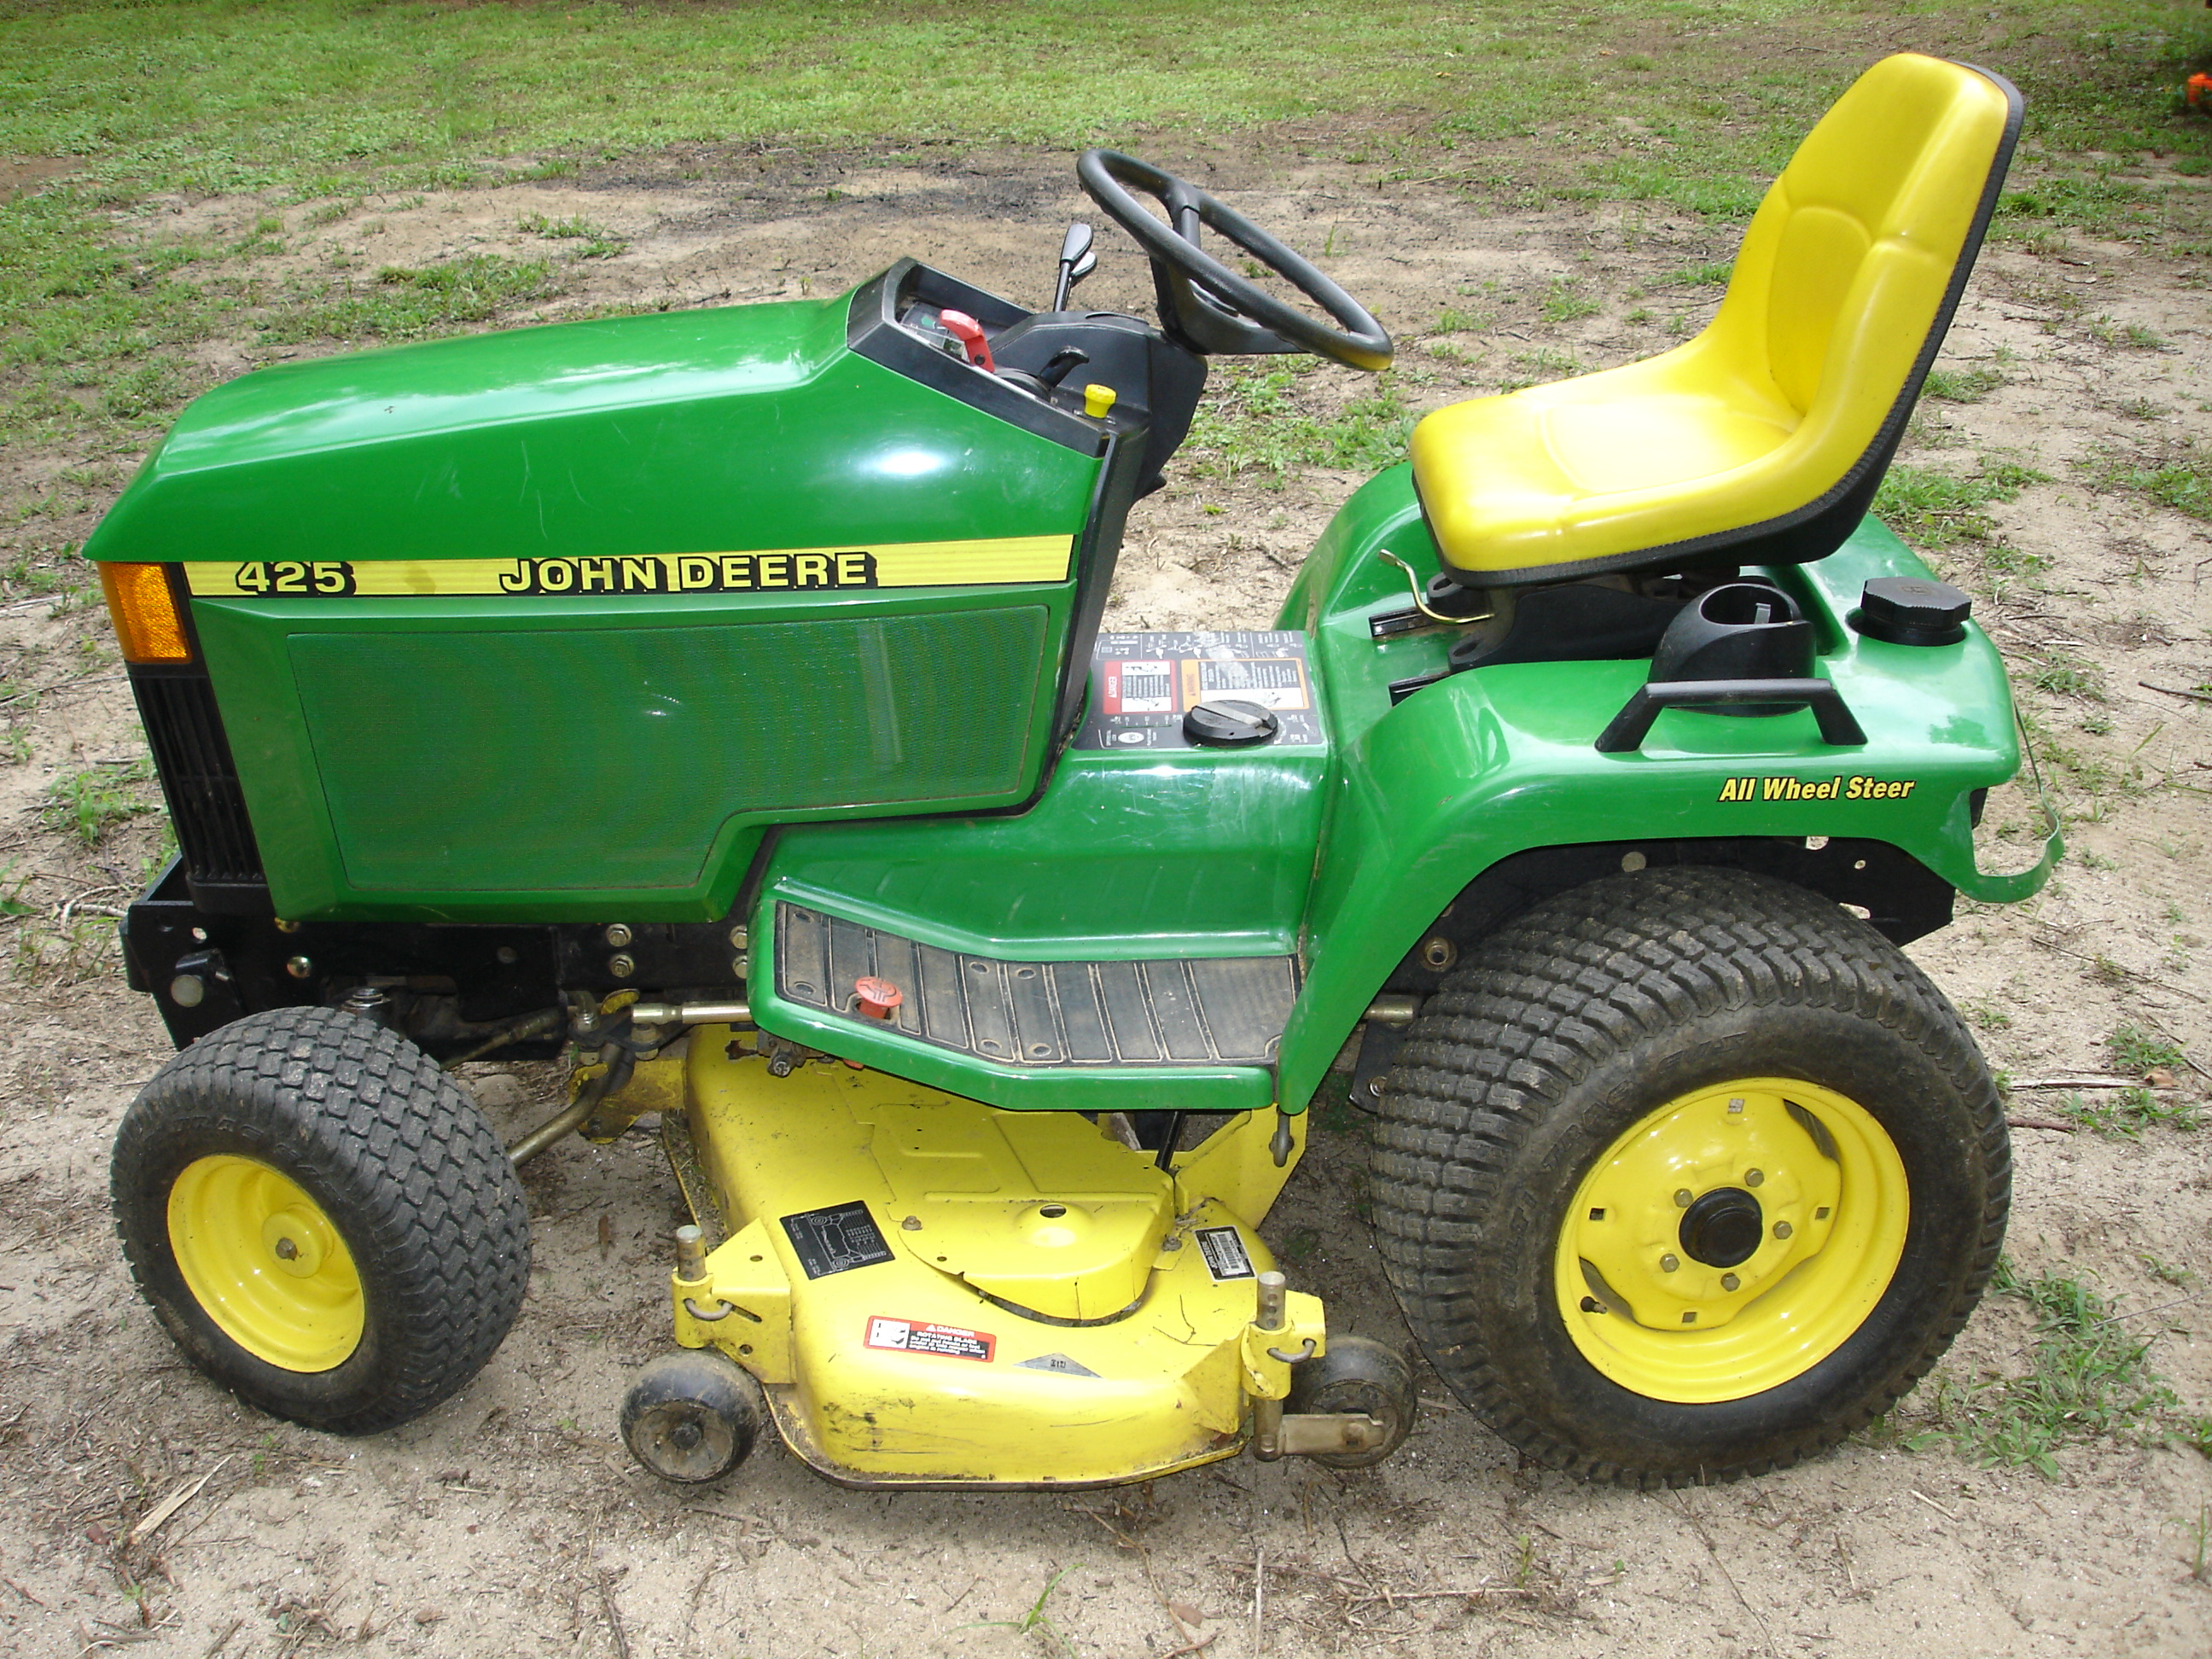
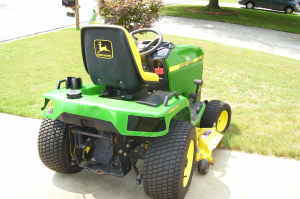
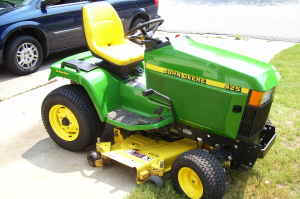
OK, here is my latest toy - a 2001 John
Deere Model 425 Garden Tractor. Not a big box store special,
this is a JD working machine with numerous attachments available.
The two photos to the left are the ones posted on Craig's List
that I purchased it from.
-
20-horsepower Kawasaki liquid-cooled engine
-
Full-pressure lubrication with replaceable oil
filter
-
No-clutch shifting with infinite control of ground
speed
-
Power steering for quick, precise control
-
Cruise control is standard
-
Heavy-duty robotically welded frame
-
3-point hitch available
-
48-inch mower deck
425
Garden Tractor |
|
| Engine |
|
| Manufacturer |
Kawasaki |
| Horsepower |
20 |
| Cylinders |
V-twin |
| Cooling Type |
Liquid |
| Transmission |
Hydrostatic |
| Cruise Control |
Standard |
| PTO |
Hydraulic |
| Tilt Steering |
Yes |
| Power Steering |
Yes |
| Approximate Weight |
1050 lbs. (4WS) |
|
|
|
|
|
 |
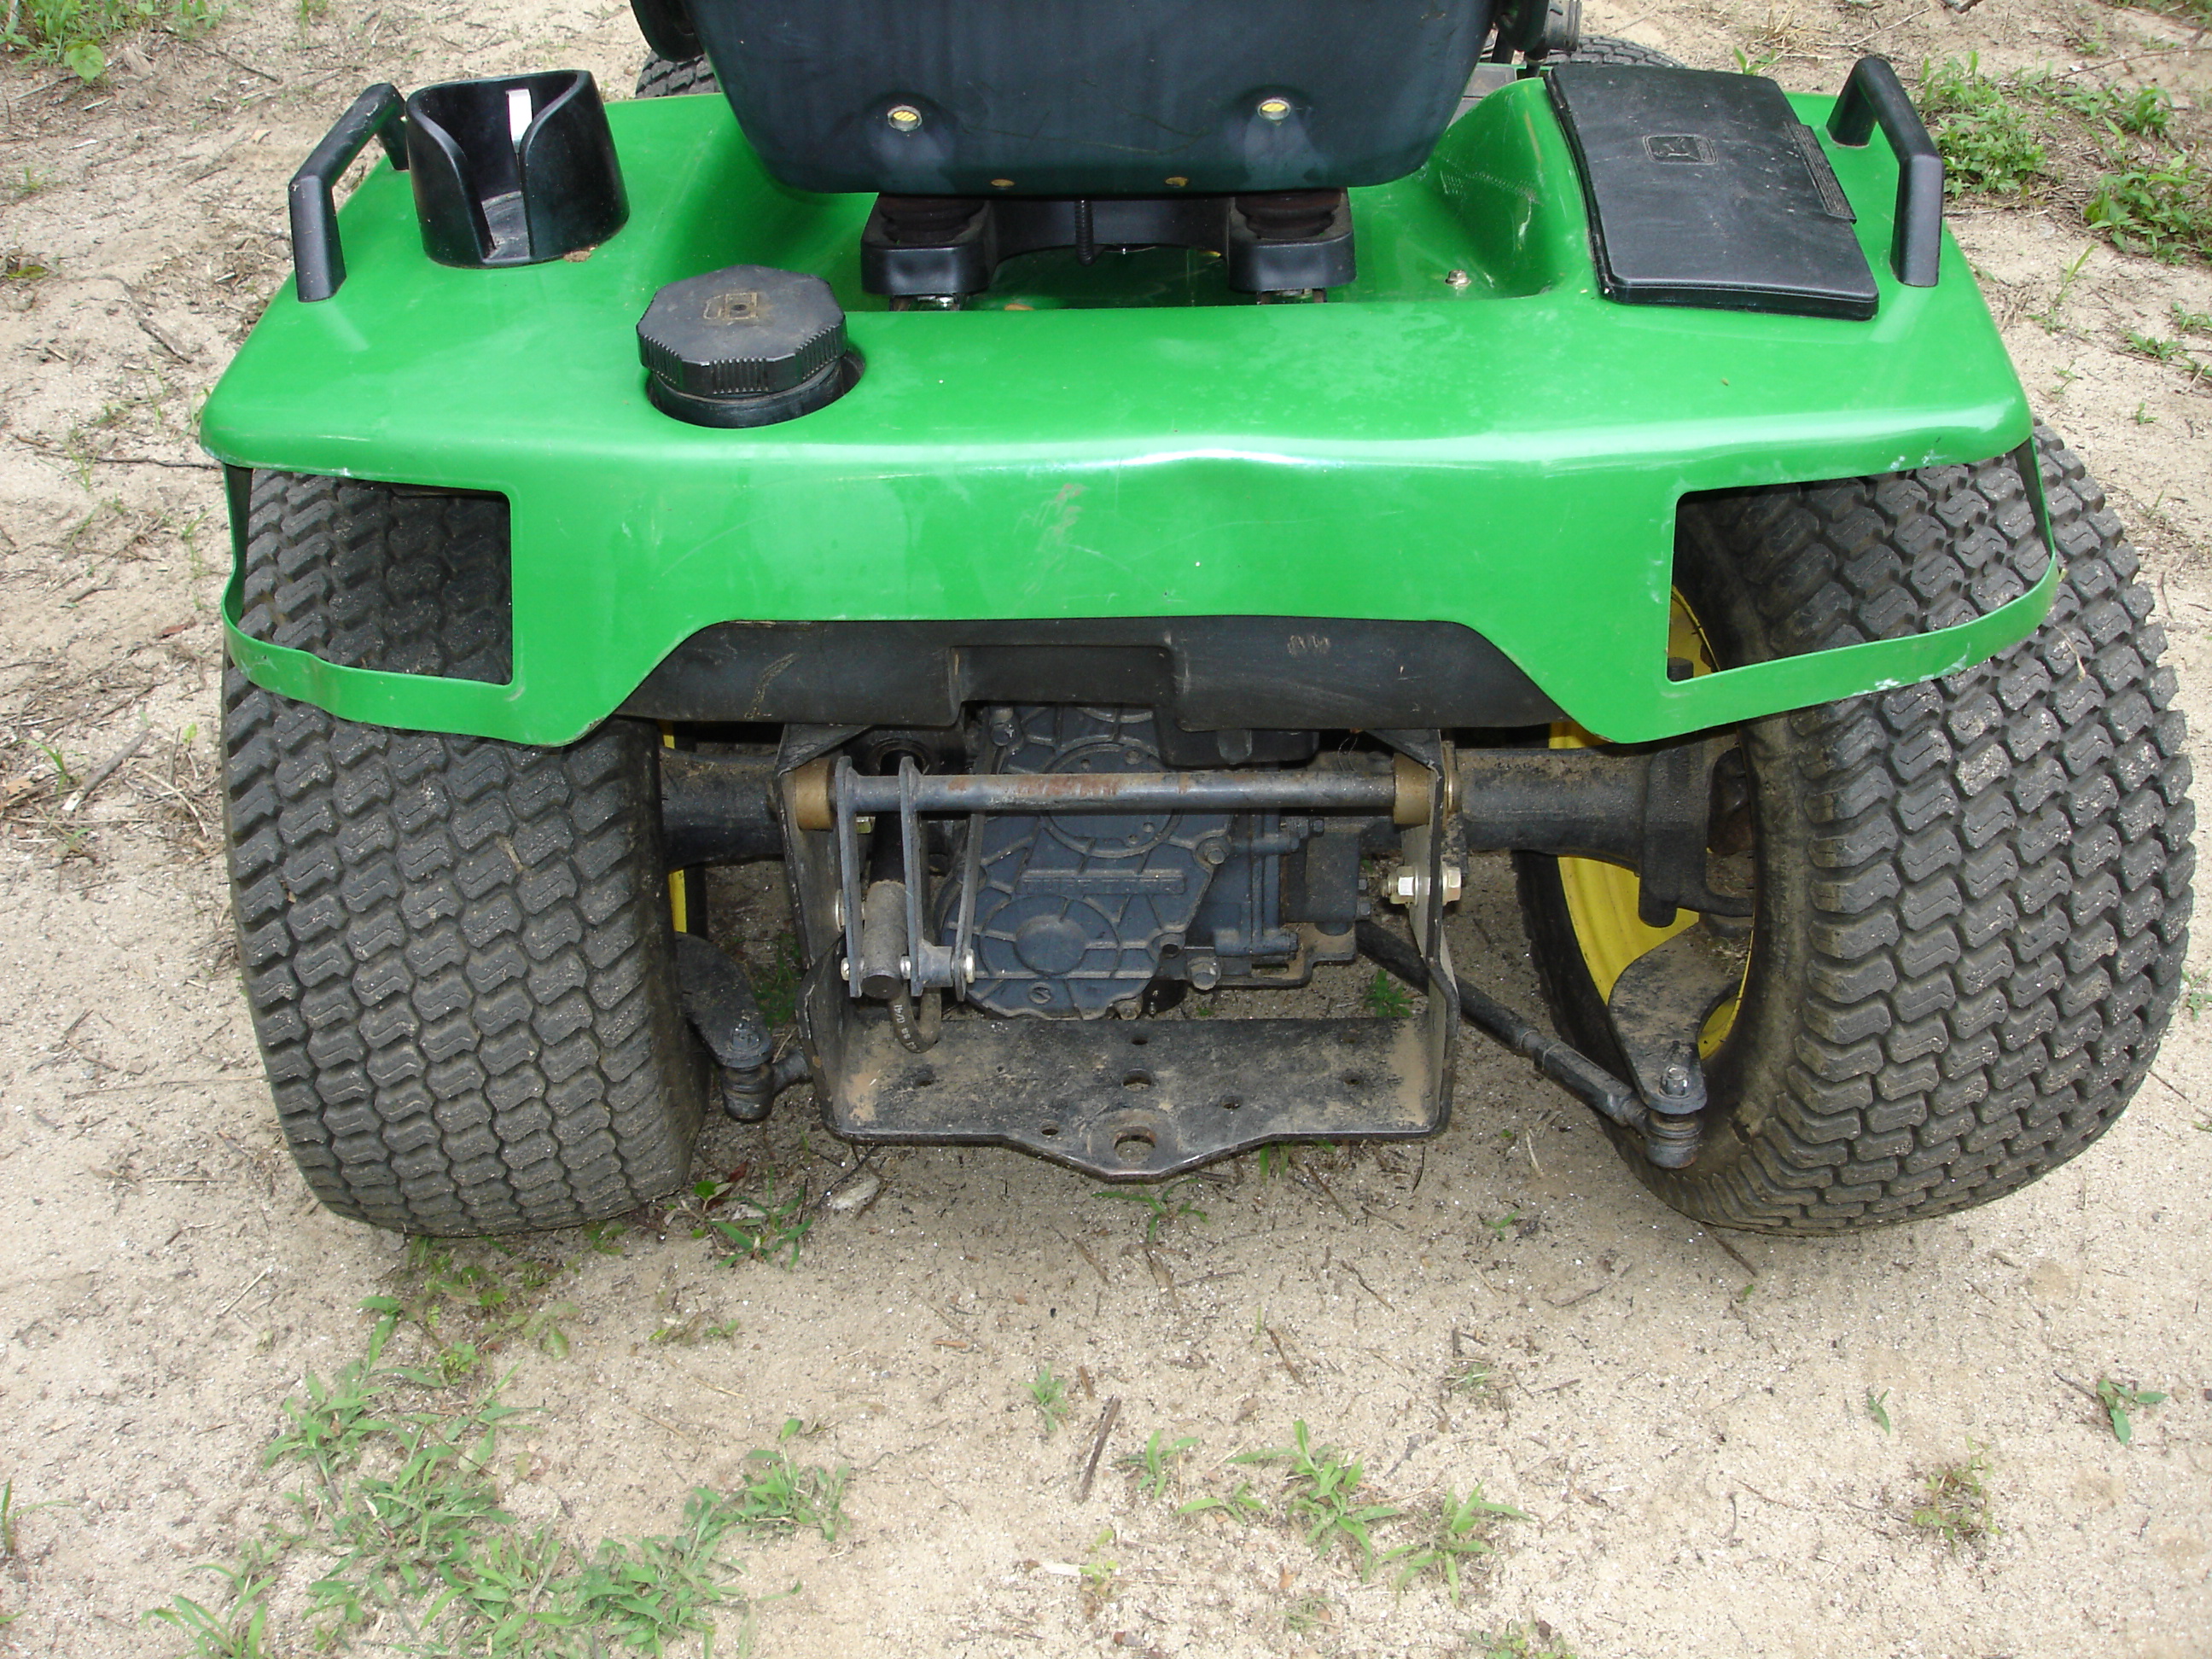
Here is the right side of the
tractor. The discharge chute cover is missing - I wonder what that
cost's at the dealer?? |
 |
. |
 |
. |
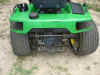 |
Here you can see the missing tail
lights and if you look closely, the rear skirting is bent and a
little wavy.
|
|
Installation of a Johnny
Buckets Sr. Loader JBSr. First
of all, let me admit I'm like a kid on Christmas morning. I keep
the 425 at our new land, which at this point doesn't have a
building. I drove up on a Friday night with the JBSr. still in the
boxes in the back of my truck. I arrived just before dark, but
still wanted to play. All of the assembly below (prior to the
hydraulic work) was completed by me alone, in the dark, on the ground
using a flashlight. Mechanical assembly time was about 1 1/2
hours. Hydraulic assembly time was about 45 minutes the next
morning. I'm sure in a garage with tools where you can find them
quickly would reduce the assembly time. Please
Note: The installation and use of this accessory is your
liability. It involves a certain amount of mechanical ability,
correct usage of tools and lifting heavy objects. Once installed
your tractor will operate differently. It will change the weight
and balance of your tractor, so you may not be able to drive in areas
you once drove in. I put this page together as a help to anyone
who decides that a Johnny Bucket Sr. is the right product for
them. I have no affiliation with Johnny Products other than as a
satisfied customer. |

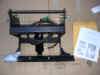
1
|
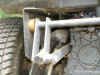
To make the JBSr. work, you need to have two available hydraulic
circuits. On the 425 you have two, but one is utilized to raise
and lower the deck. Normally the second circuit is unused, but
available. Note the two levers to the right of the steering
wheel. The upper control lever controls the deck raise/lower
circuit and the lower control is unused.
|
|
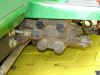
2 |
Well, the first step in getting the JBSr. working is to make
sure I can utilize the hydraulics on the 425. To the left you can
see the access for the hydraulic circuits. On the back side are the two
hoses going to the mower deck lift which as I pointed out above are on
one circuit. The additional circuit is unused on my tractor. Note
the four plugs, two for each circuit. If you don't understand the
four plugs for two circuits thing, check out: http://www.rarecomp.com/aux-hyd/index.php?section=hydraulictheory
|
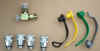
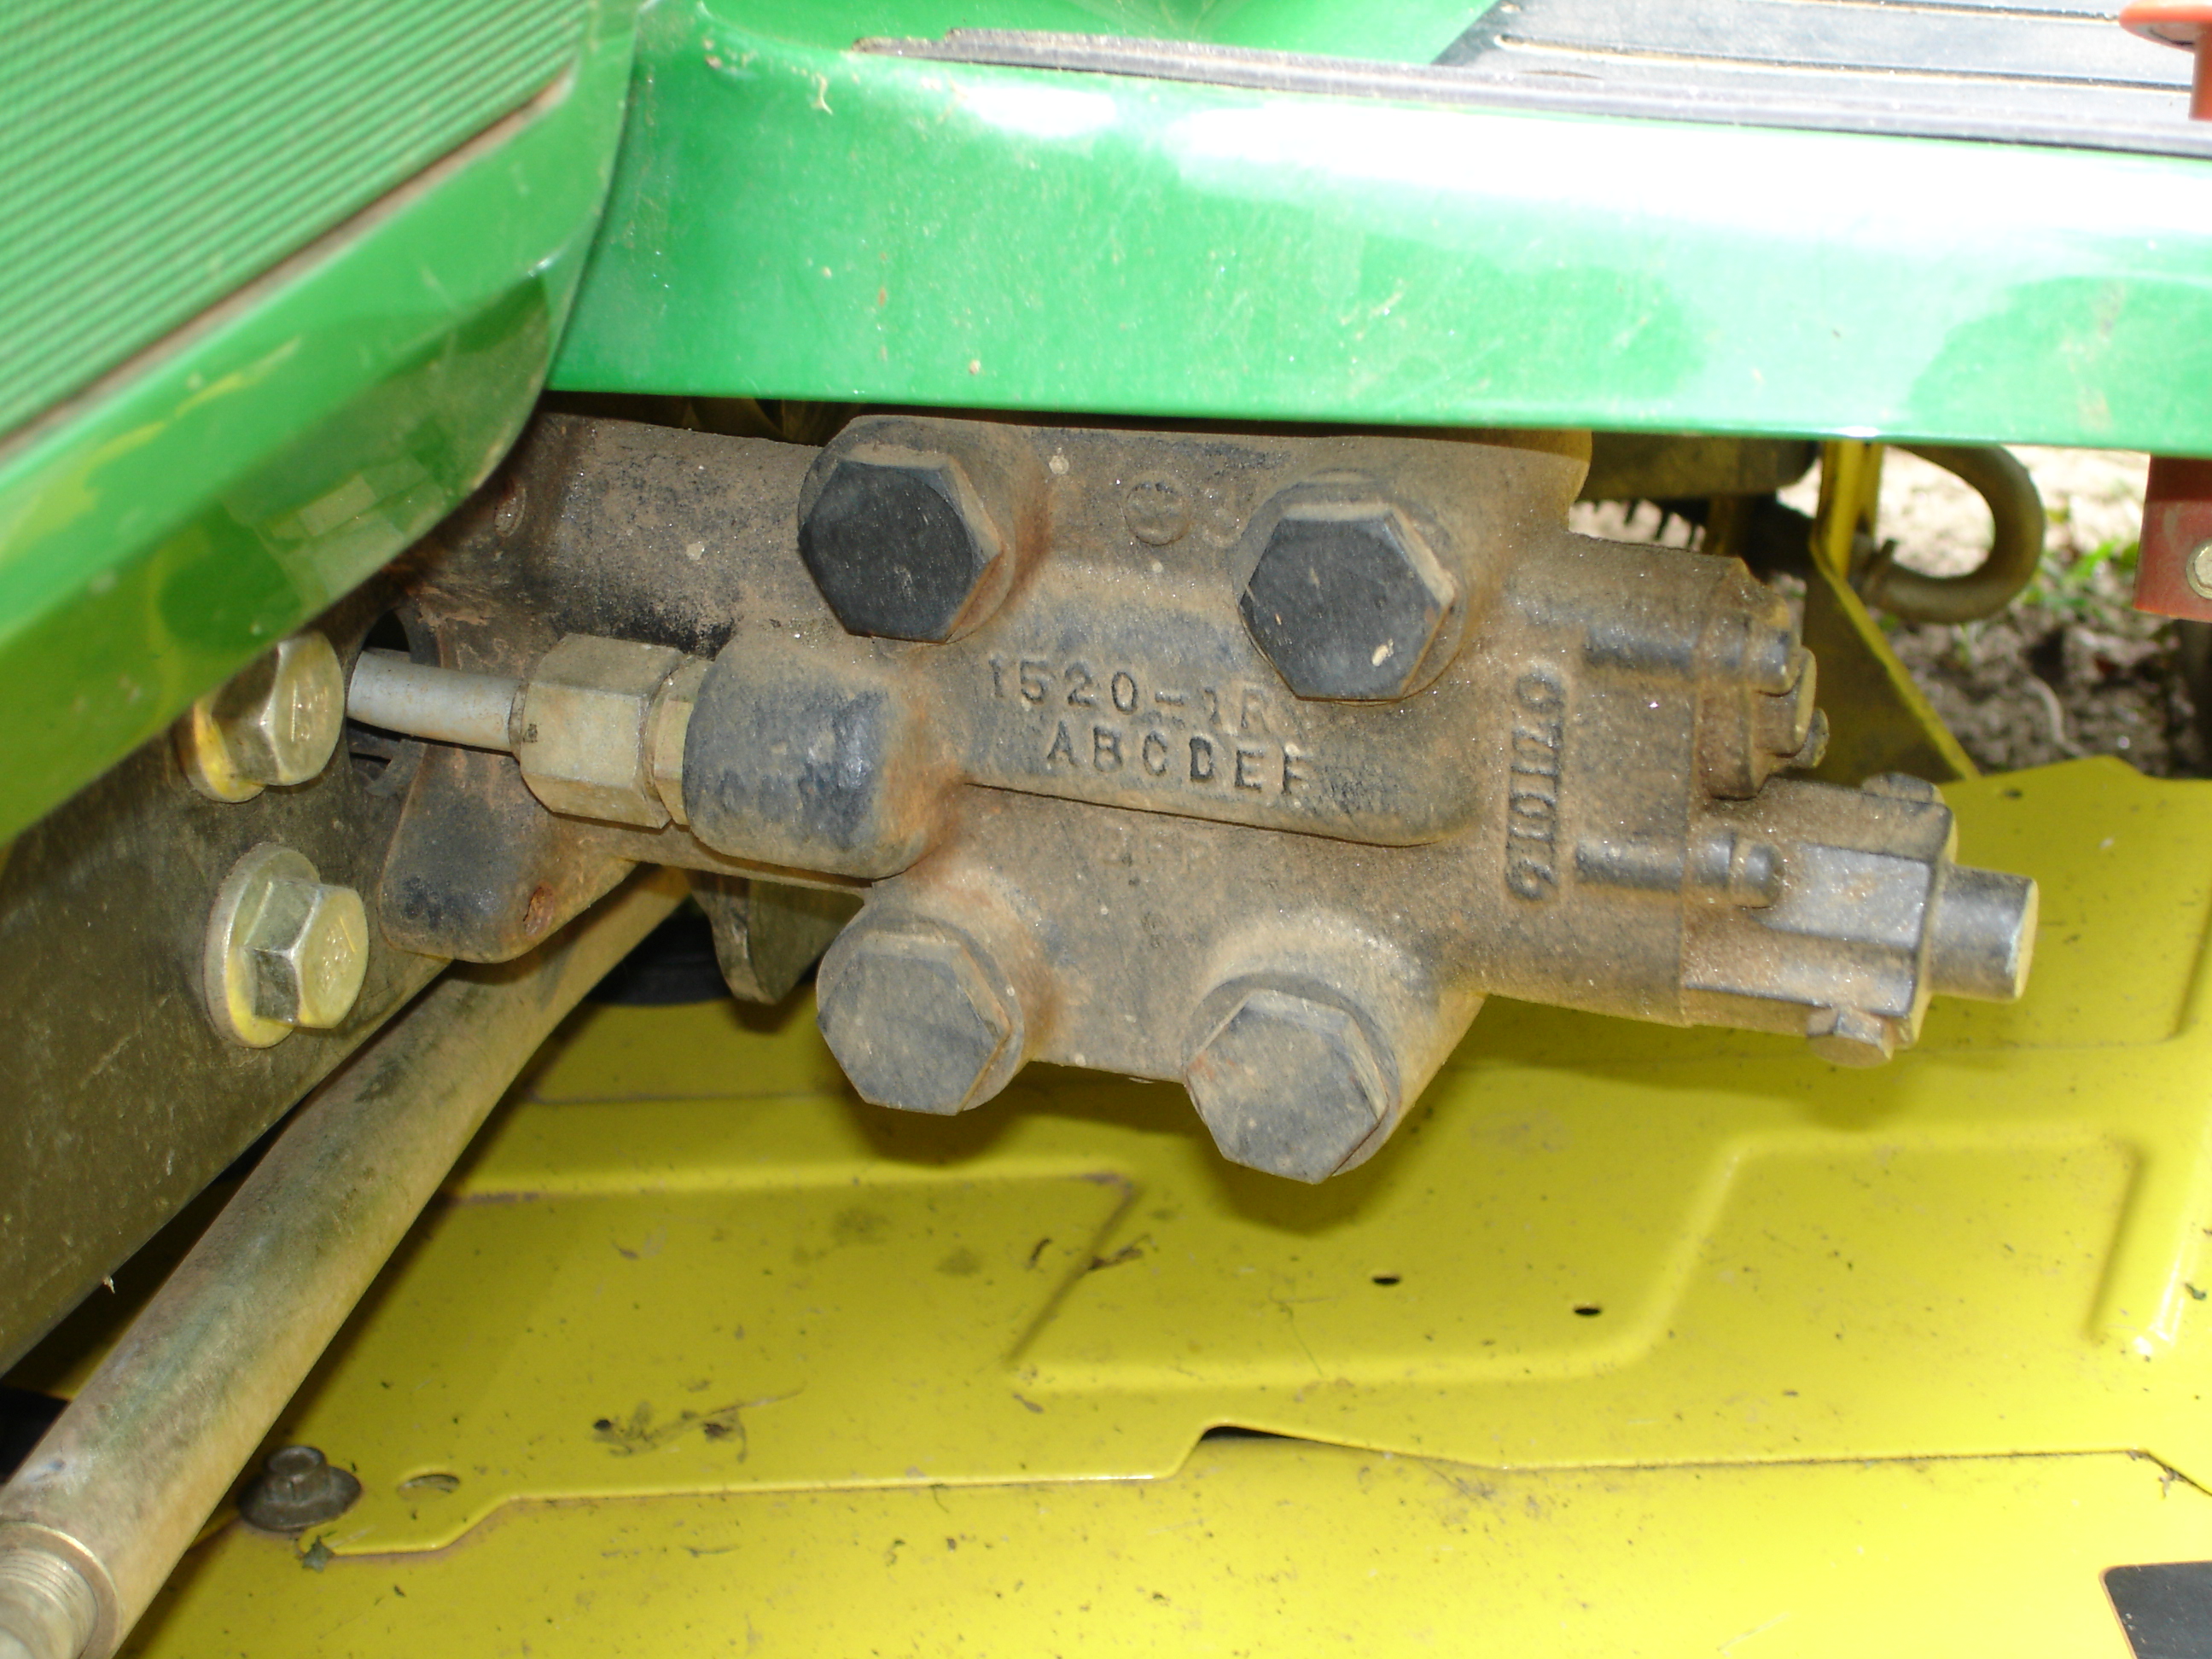
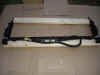
3
|
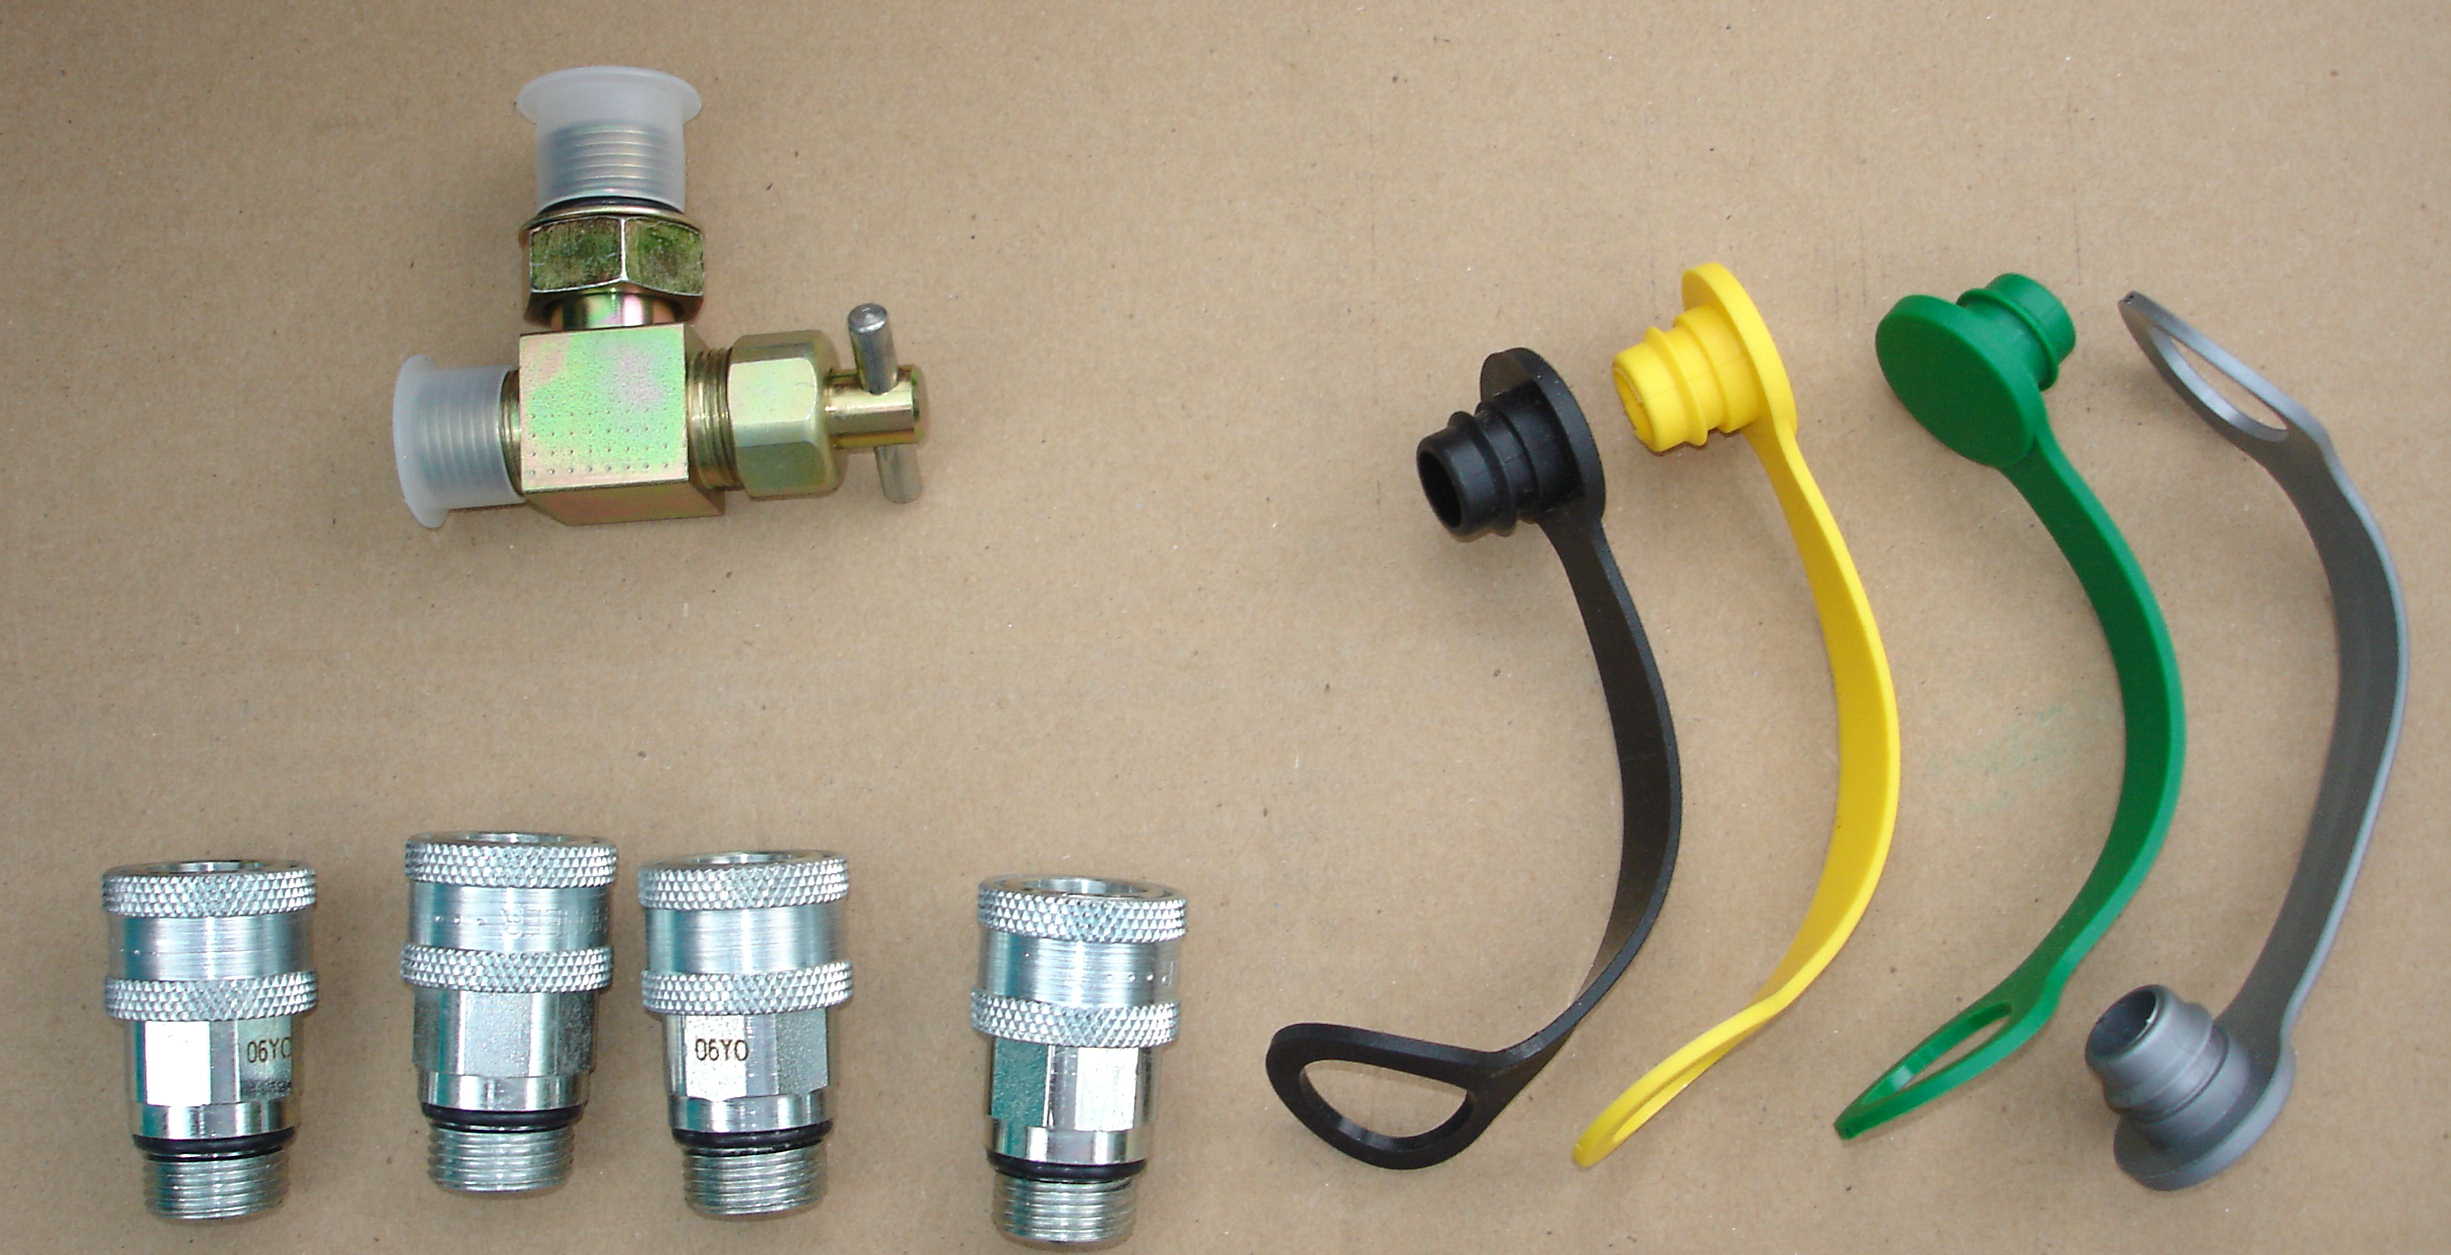
To the left are two different "parts" I needed to get my 425
ready for the JBSr. The four connectors at the bottom along with the
four color coded dust covers are the "Hydraulic Quick
Coupler Kit" I picked up from Aux-Hyd.com
$69.10 Plus shipping. These quick couplers
will replace the four plugs above and allow the four hoses form the JBSr.
to connect in a flash.
Now, remember above I said one circuit is being used to raise and lower
the mowing deck? To use this circuit you need to install (if your
tractor doesn't have one, some do) a a mower lift
cylinder lockout valve. Pictured in the upper left hand corner of the
photo to the left is the stock lockout valve
from John Deere. For the 425 it is JD part number AM118213, a mere
$85 plus shipping. Aux-Hyd.com
also sells an aftermarket valve, but they were out of stock when I purchased
mine. |

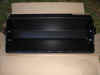
4
|
This is where the lift
cylinder lockout valve is installed. Remove the elbow on the hydraulic
tube (put a few paper towels under it, some fluid will leak out) and
replace it with the lift
cylinder lockout valve pictured in photo #3. When I first removed
the elbow, I would have sworn that the running board would have to be
removed to get it in there, but this thing is engineered perfectly. The
elbow comes right out and the valve goes right in. When finished,
the valve handle faces the side of the tractor and is close to the
bottom of the running board. Once installed, you run the mower
deck all the way to the top, then close this valve. This removes
the mower deck lift
cylinder from the hydraulic circuit. Now the hydraulic
circuit that would normally be used to raise/lower the deck is used by
the JBSr. through the quick connects. |
|
5
|
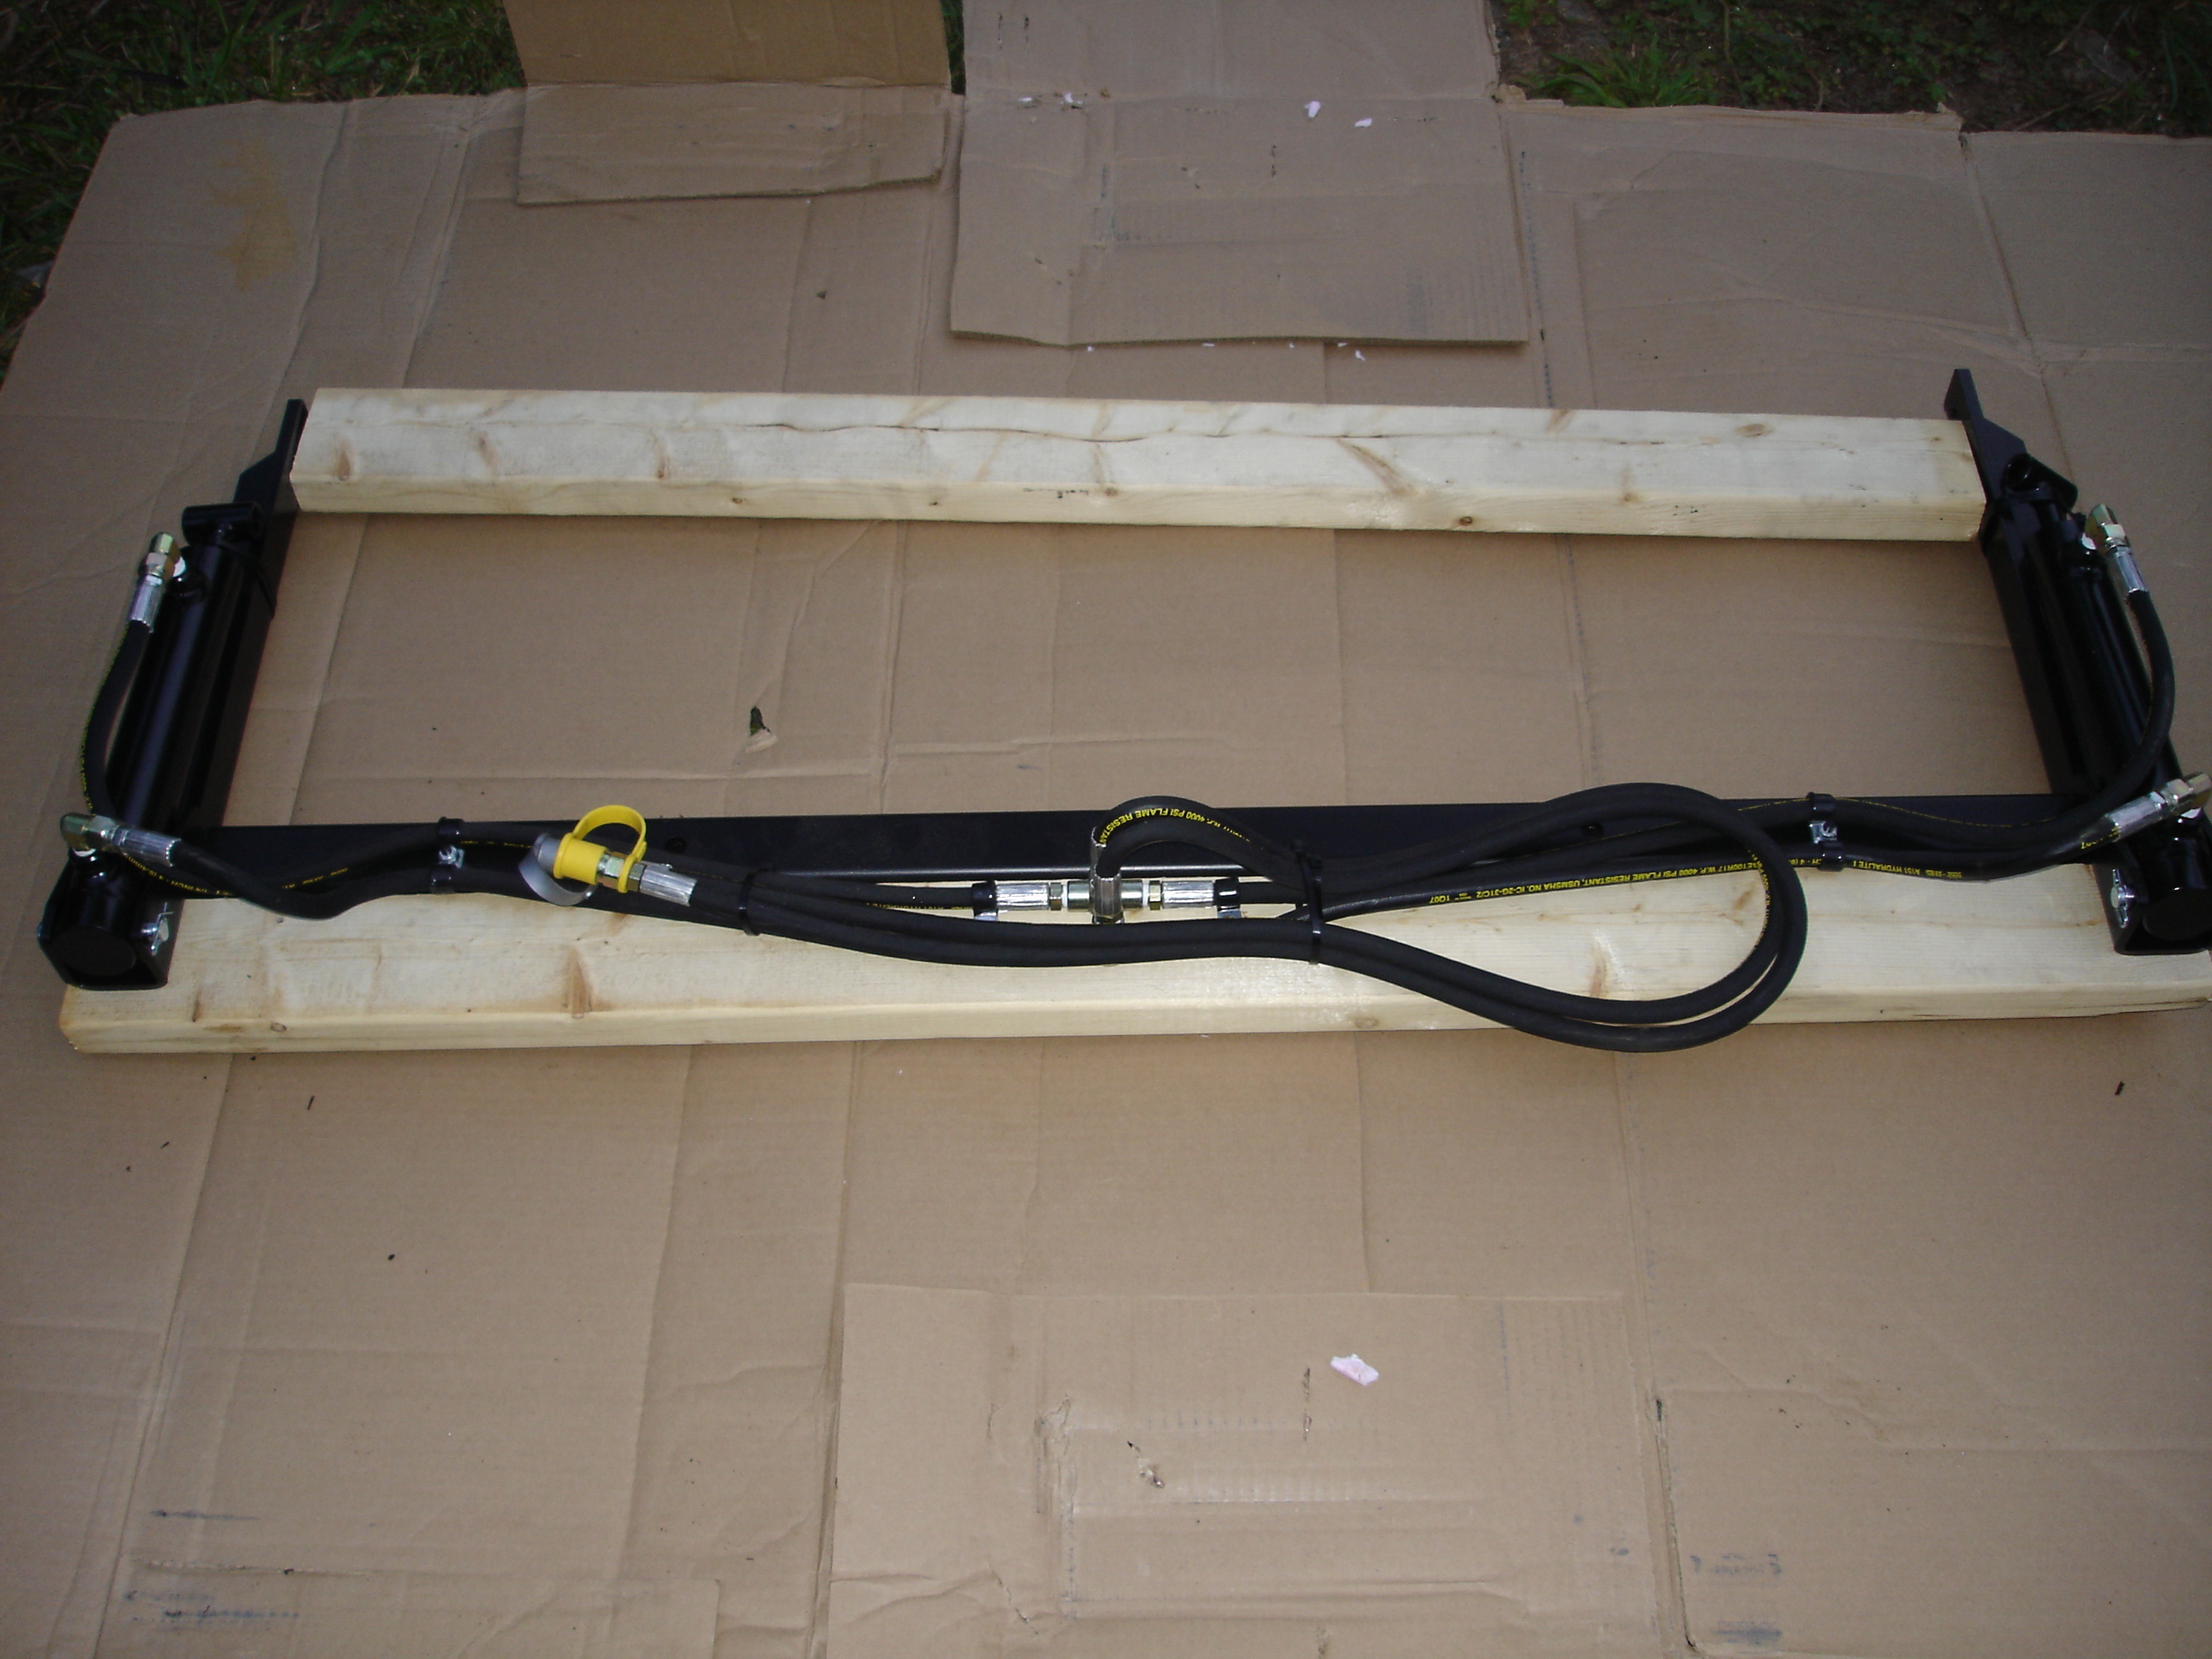
The JBSr. will arrive in three boxes (OK, I got four because I purchased
the optional tooth bar). To the left is the contents of box #1,
which is the instructions and the bracket for the front of the 425
connected to the raise/lower portion of the JBSr. The hydraulic cylinder
to raise/lower the JBSr. is already attached, as well as the hydraulic
lines. |
6
|
Box #2 contains the JBSr. bucket. I'm sure the UPS guy will always
remember me after delivering this to my house! |
7
|
Box #3 contains the bucket arms with the dump hydraulic cylinder and
hoses attached. The two 2X4s are removed after shipping, they just
hold everything together while in transit. |
8
|
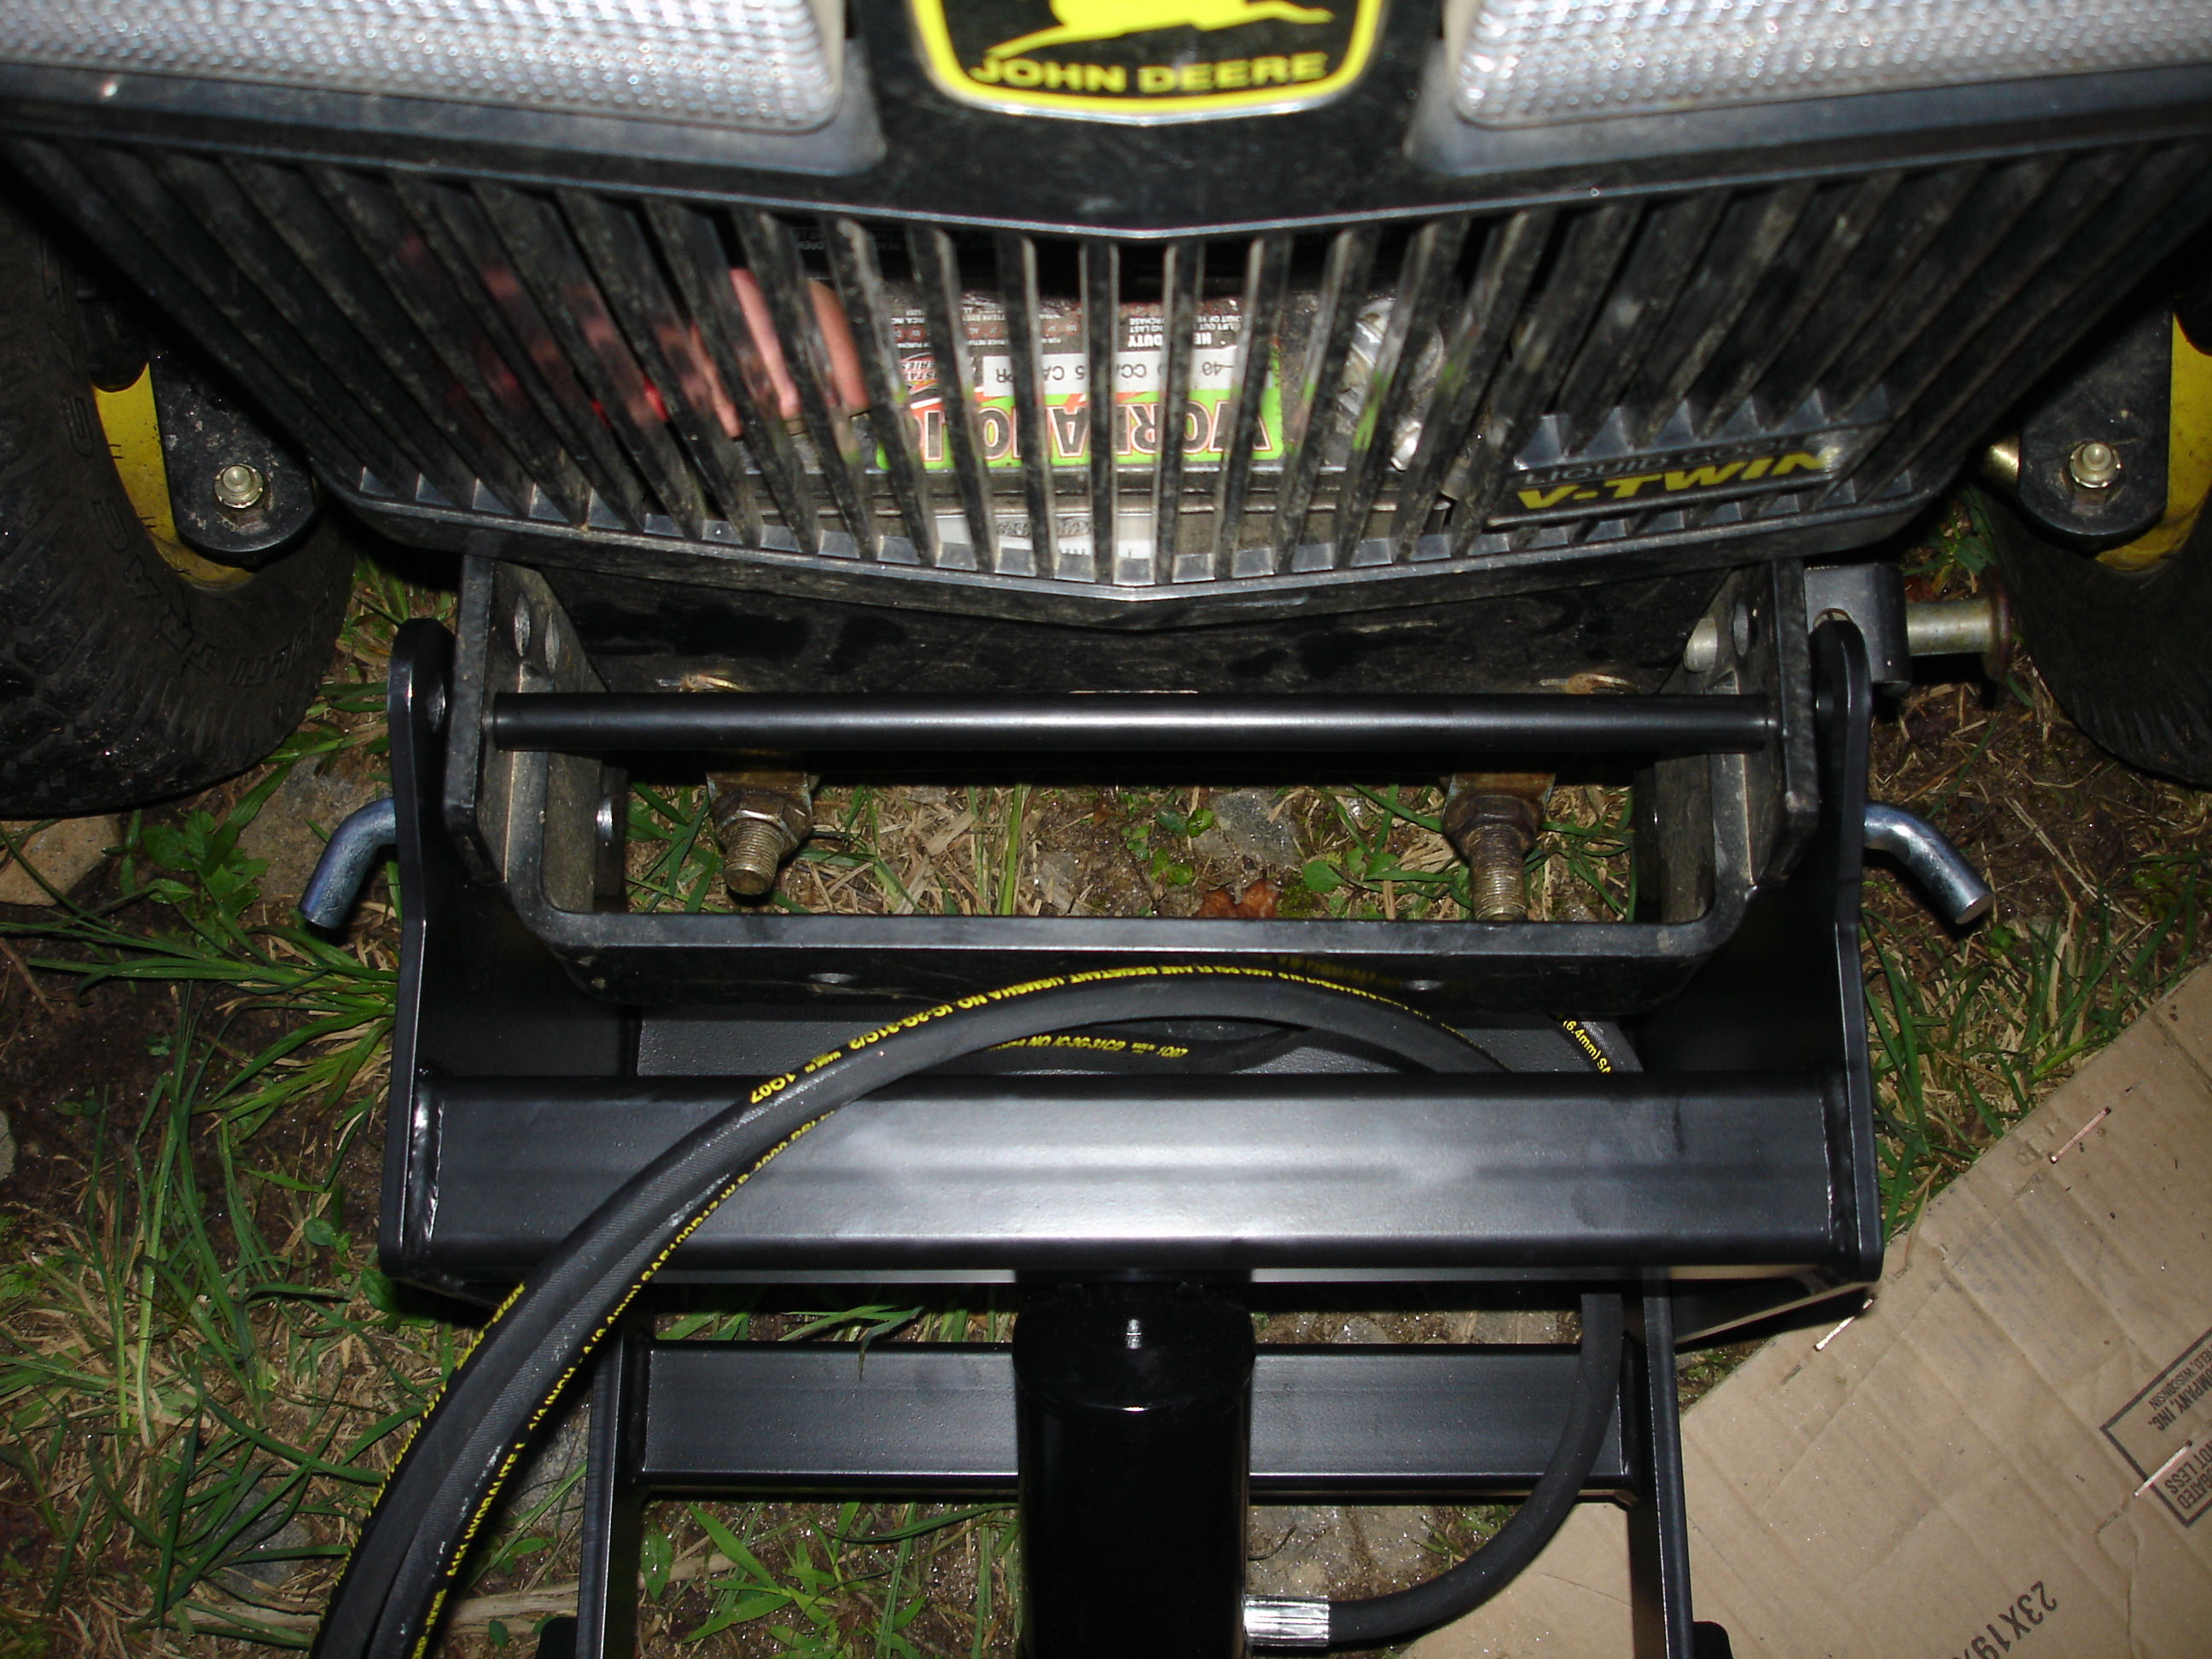
The first step I took was to mount the front bracket on the 425.
The JBSr. bracket comes with a solid bar that you slide through the top
front two holes on the stock JD front bracket. Once this bar is in
place the JBSr. bracket hooks over the bar and is held in place by two
spring pins. |
|
|
The next step is to attach the bucket arms to the bucket. While I
was able to do this alone, the instructions say it is easier with two
people and I believe it. The arms span the bucket and are. held in
place with pins and spring clips. The dump hydraulic cylinders are
also attached to the bucket at this time, again with pins and spring
clips. (sorry, no picture of this, I'll take some in the future) |
|
|
Now connect the bucket arm assembly to the front bracket. Four
bolts connect these two assemblies together. (sorry, no picture of
this, I'll take some in the future) |

9
|
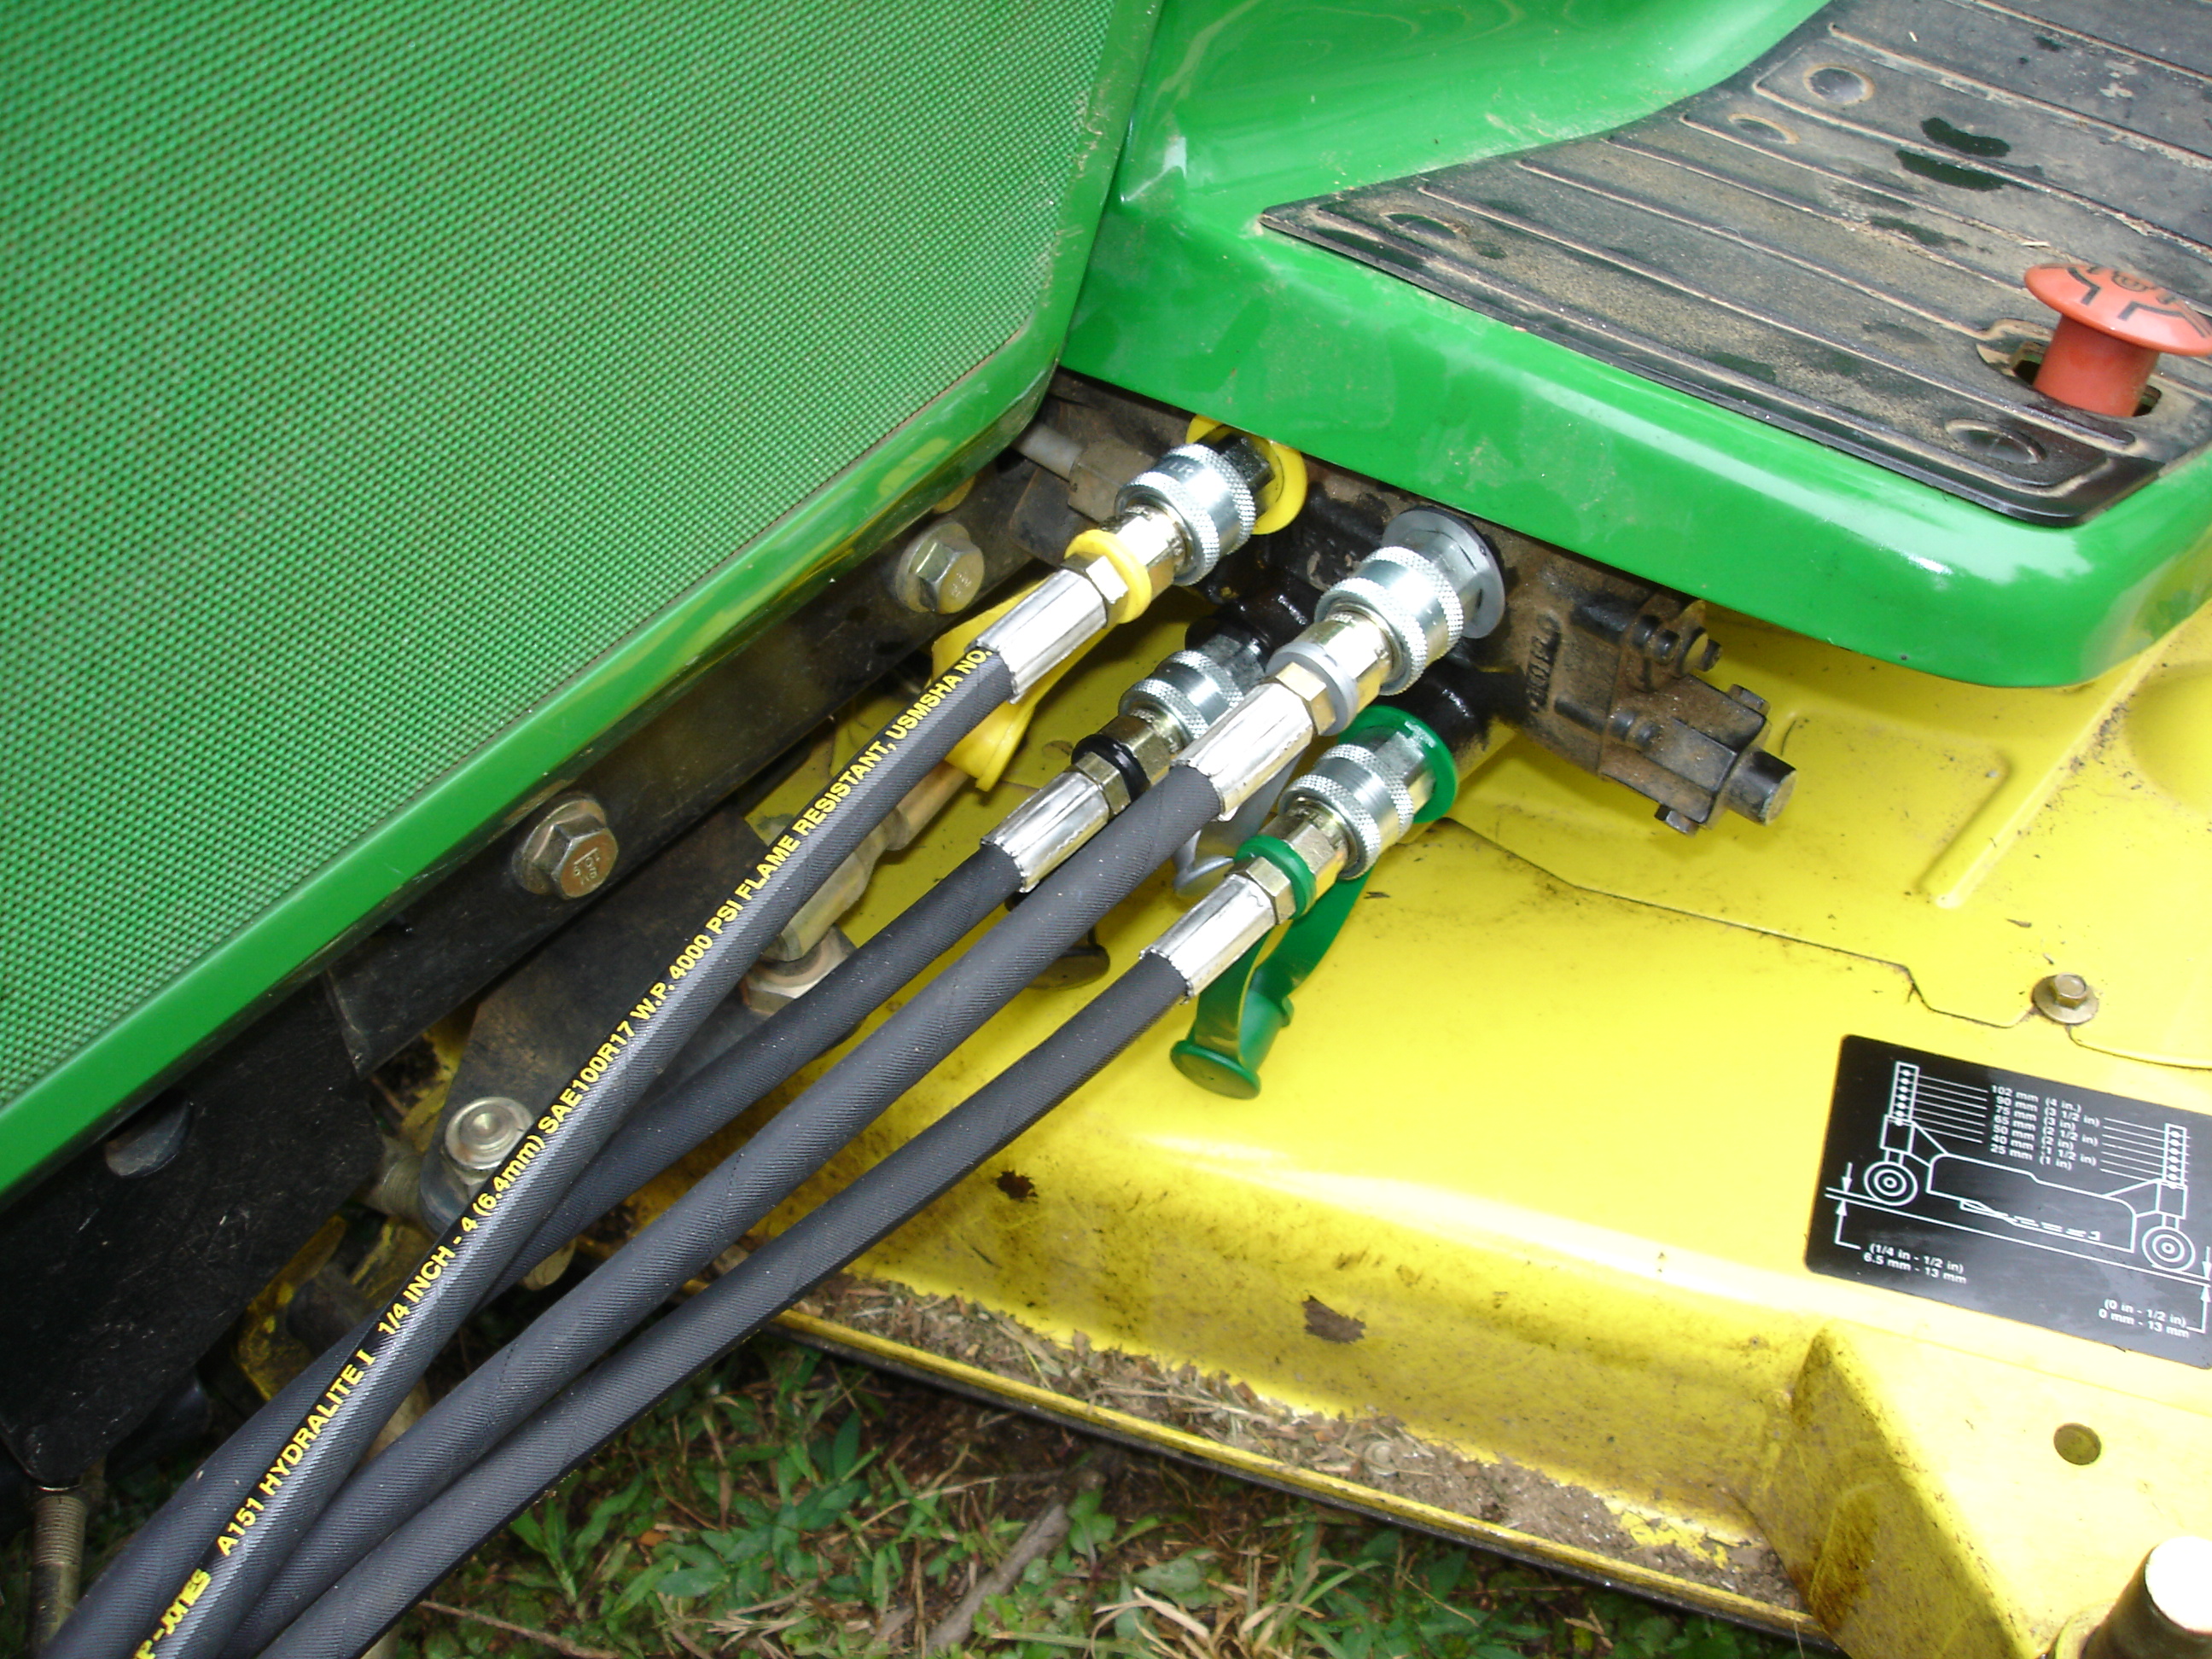
Now, remember the four quick connectors from photo #3? Remove the
four plugs on the front of the hydraulic assembly under the left
footboard. Again, a few paper towels will catch the fluid that will leak
out when you remove the plugs. All are "O" ring sealed, just just snug them
up. I recommend rubbing a little hydraulic fluid on the
"O" ring before you put it in place. The instruction
that come with the quick connectors have the color codes, but just in
case, looking from the front:
Upper Left - Yellow
Upper Right - Silver
Lower Left - Black
Lower Right - Green
Funny how things work, but the hoses that come on the JBSr. are also
color coded! Now, don't ask how I know but be very careful when
you put the yellow quick connector on. Because of it's placement
it is possible to hit the one below it with your wrench causing you to
think it has been completely installed - when in fact it is not
tight.
Also, when you are done remember to top off your hydraulic fluid!
|
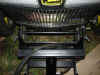
 |
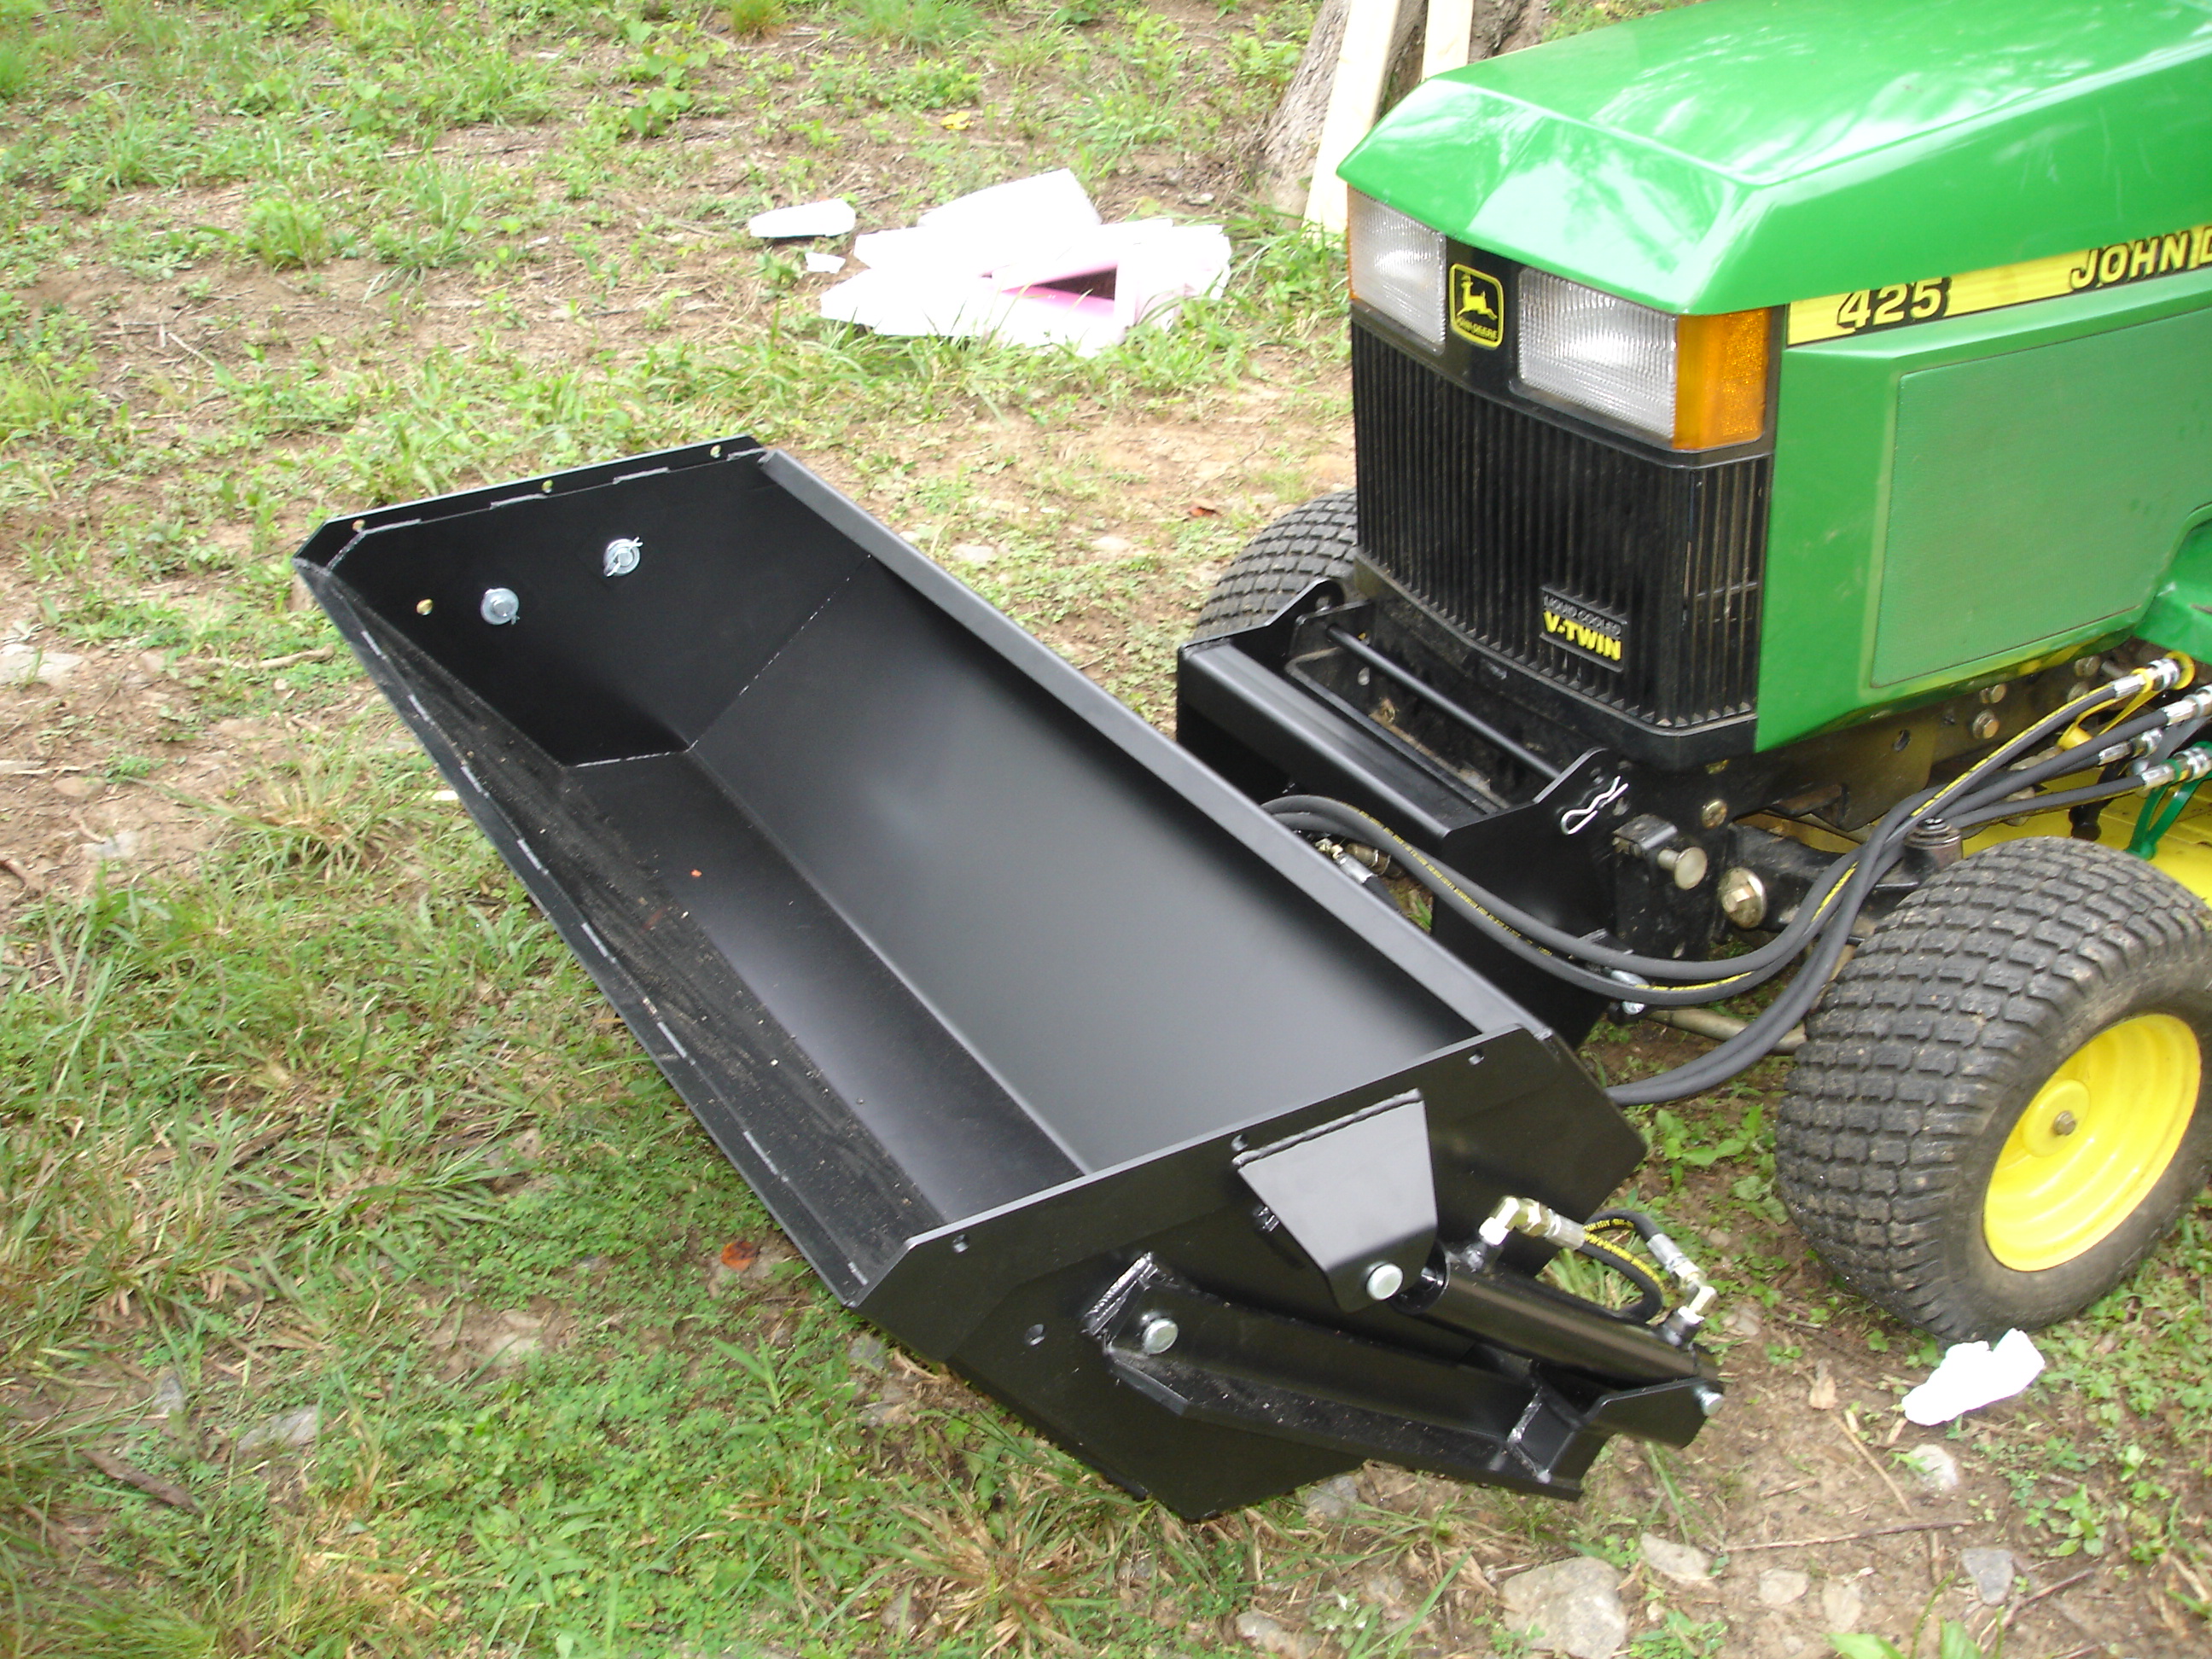
Well, here is the final product. I don't know what I was
expecting, but the product really impresses me. This product is
extremely well built and I can't see how it could be damaged in normal
homeowners use (OK, other than cutting a hose). |
 |
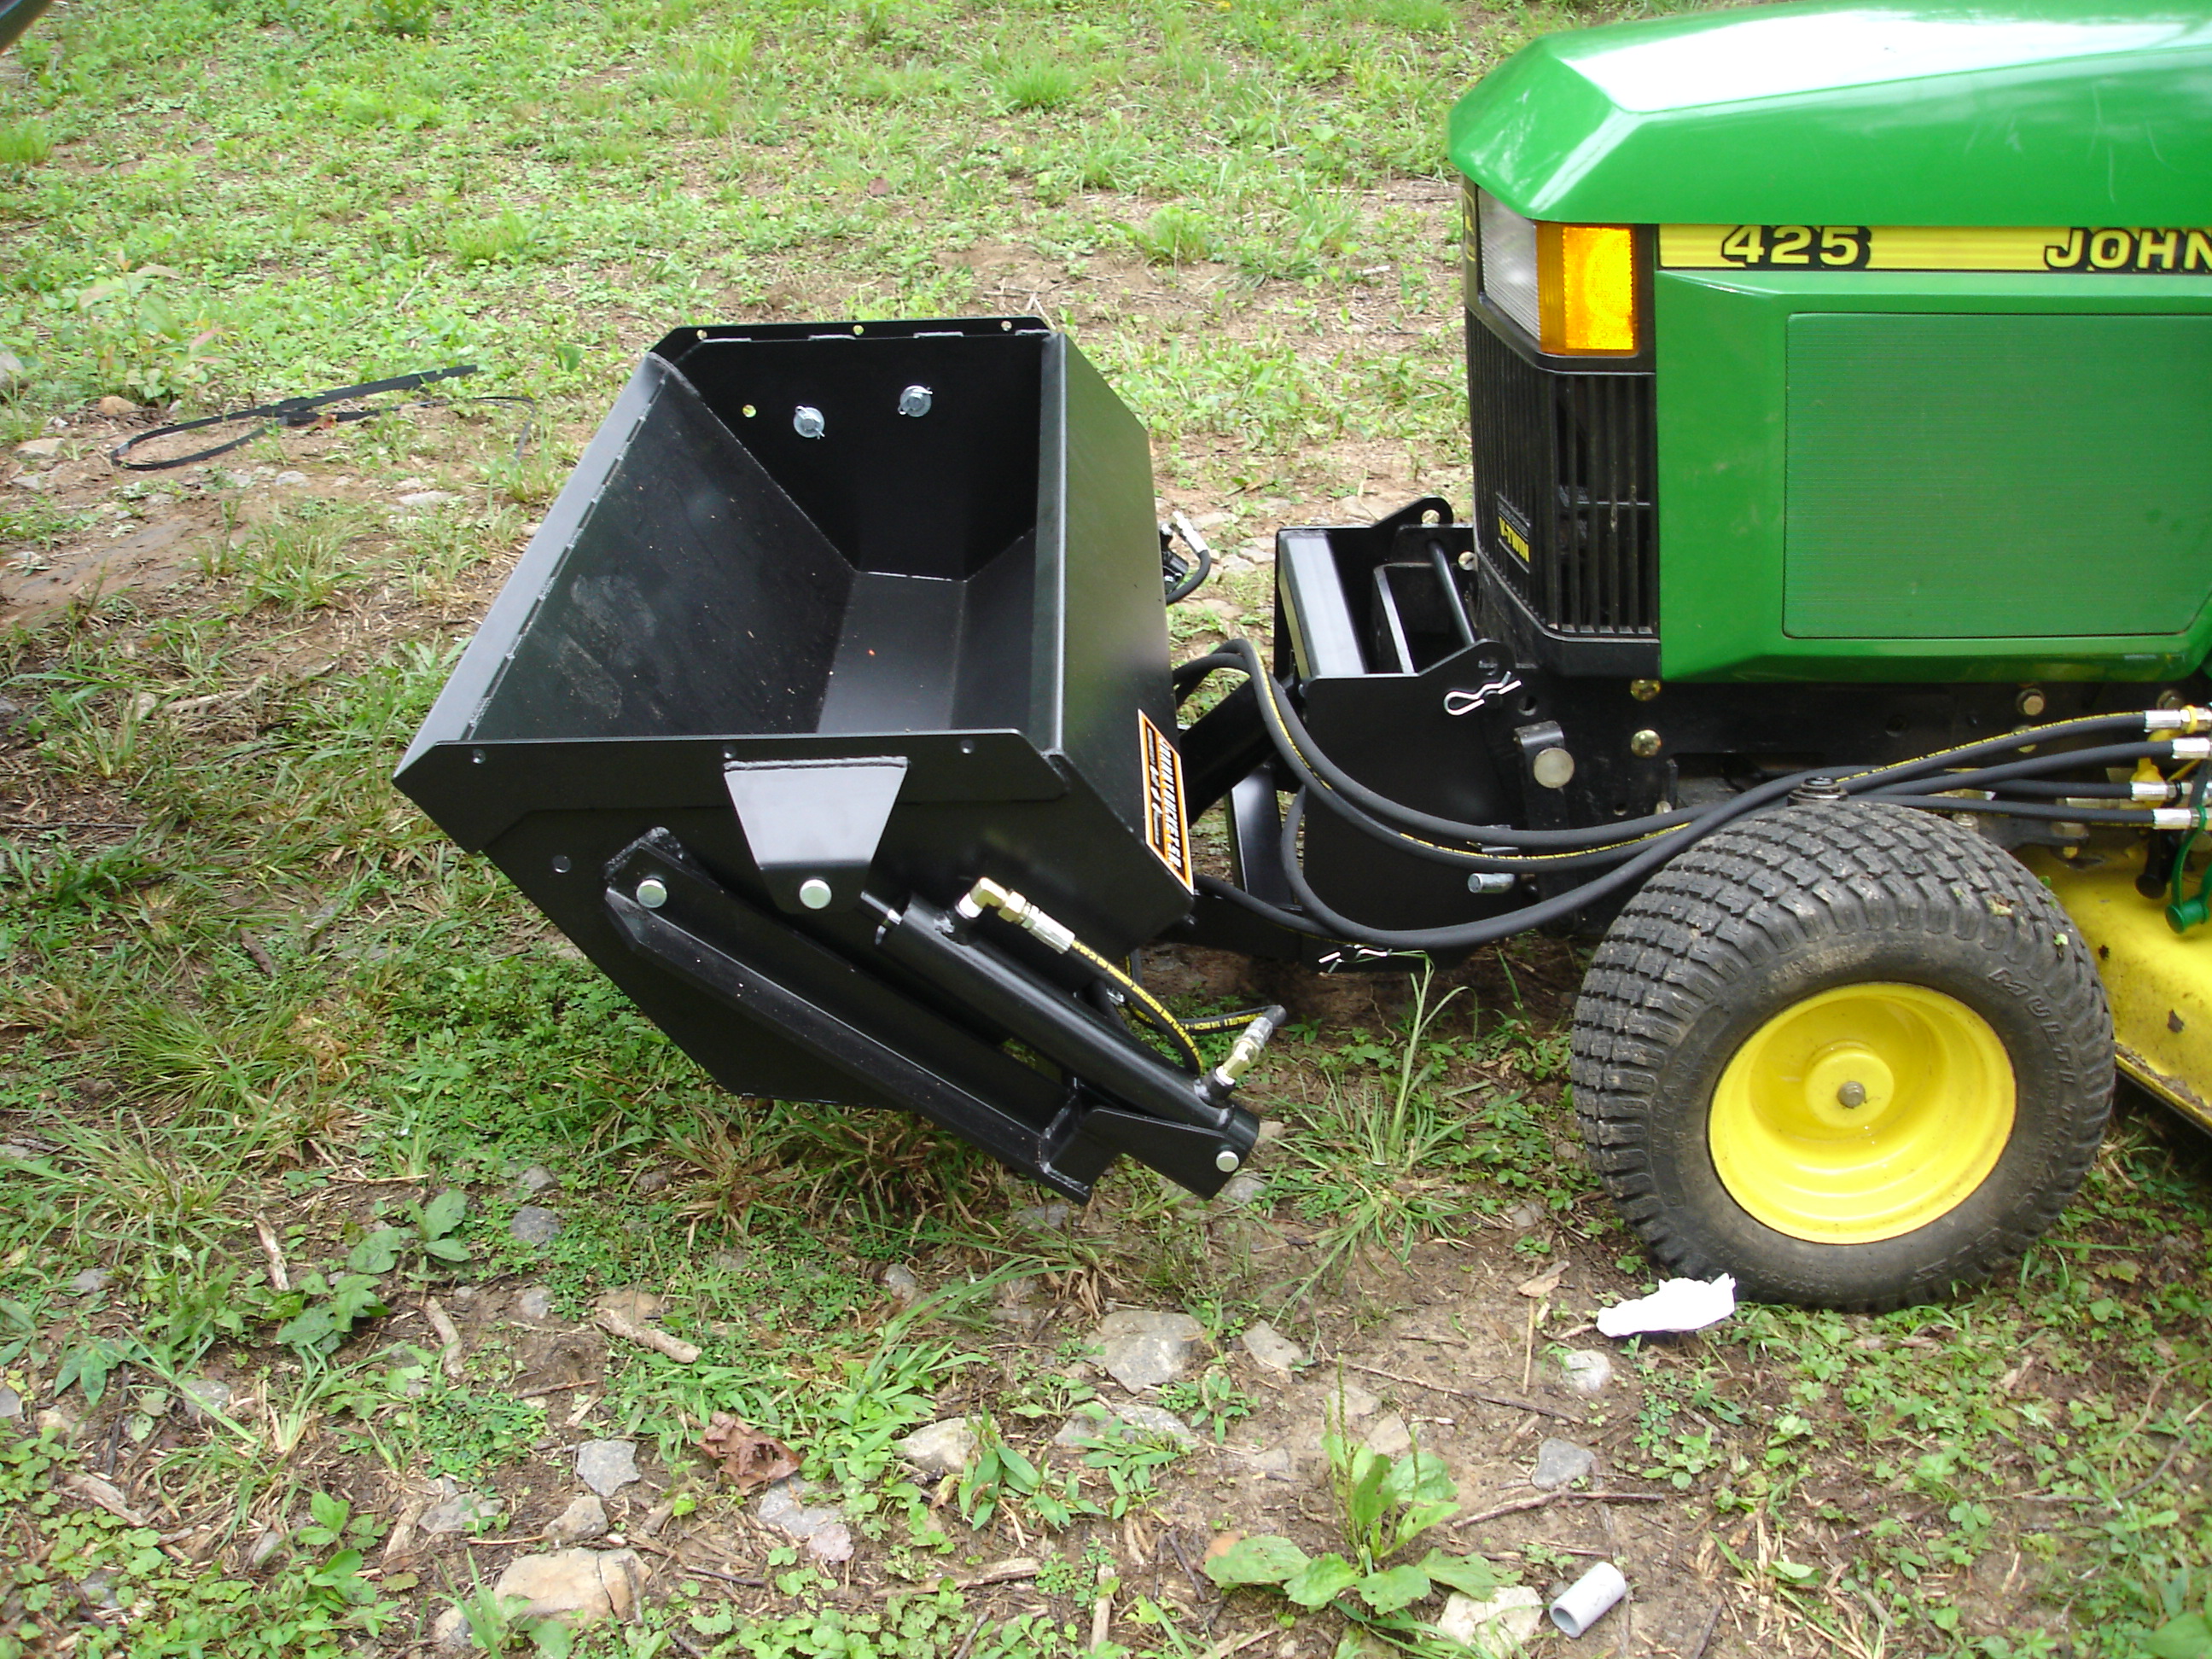
It will never replace a front end loader. As you can see from the photo
to the left it doesn't raise that far off the ground.. But, I can
say that it was never designed to replace a FEL. It is a
mechanical replacement for a wheelbarrow. I used it all day the first
day. I found myself moving rocks I would never have been able to
move before. I was able to move material (soil/rock/stone) in a shorter
length of time than I ever had.
The only "part" that wasn't included with the JBSr. that I
added was a large cable tie. In the photo to the left you can see
the four hydraulic as the are routed between the body and the left front
tire. I loosly tied them to the front bracket to keep them from
getting into the tire.
All in all, I'm extremely happy with the purchase!
|
|
|
|
 |
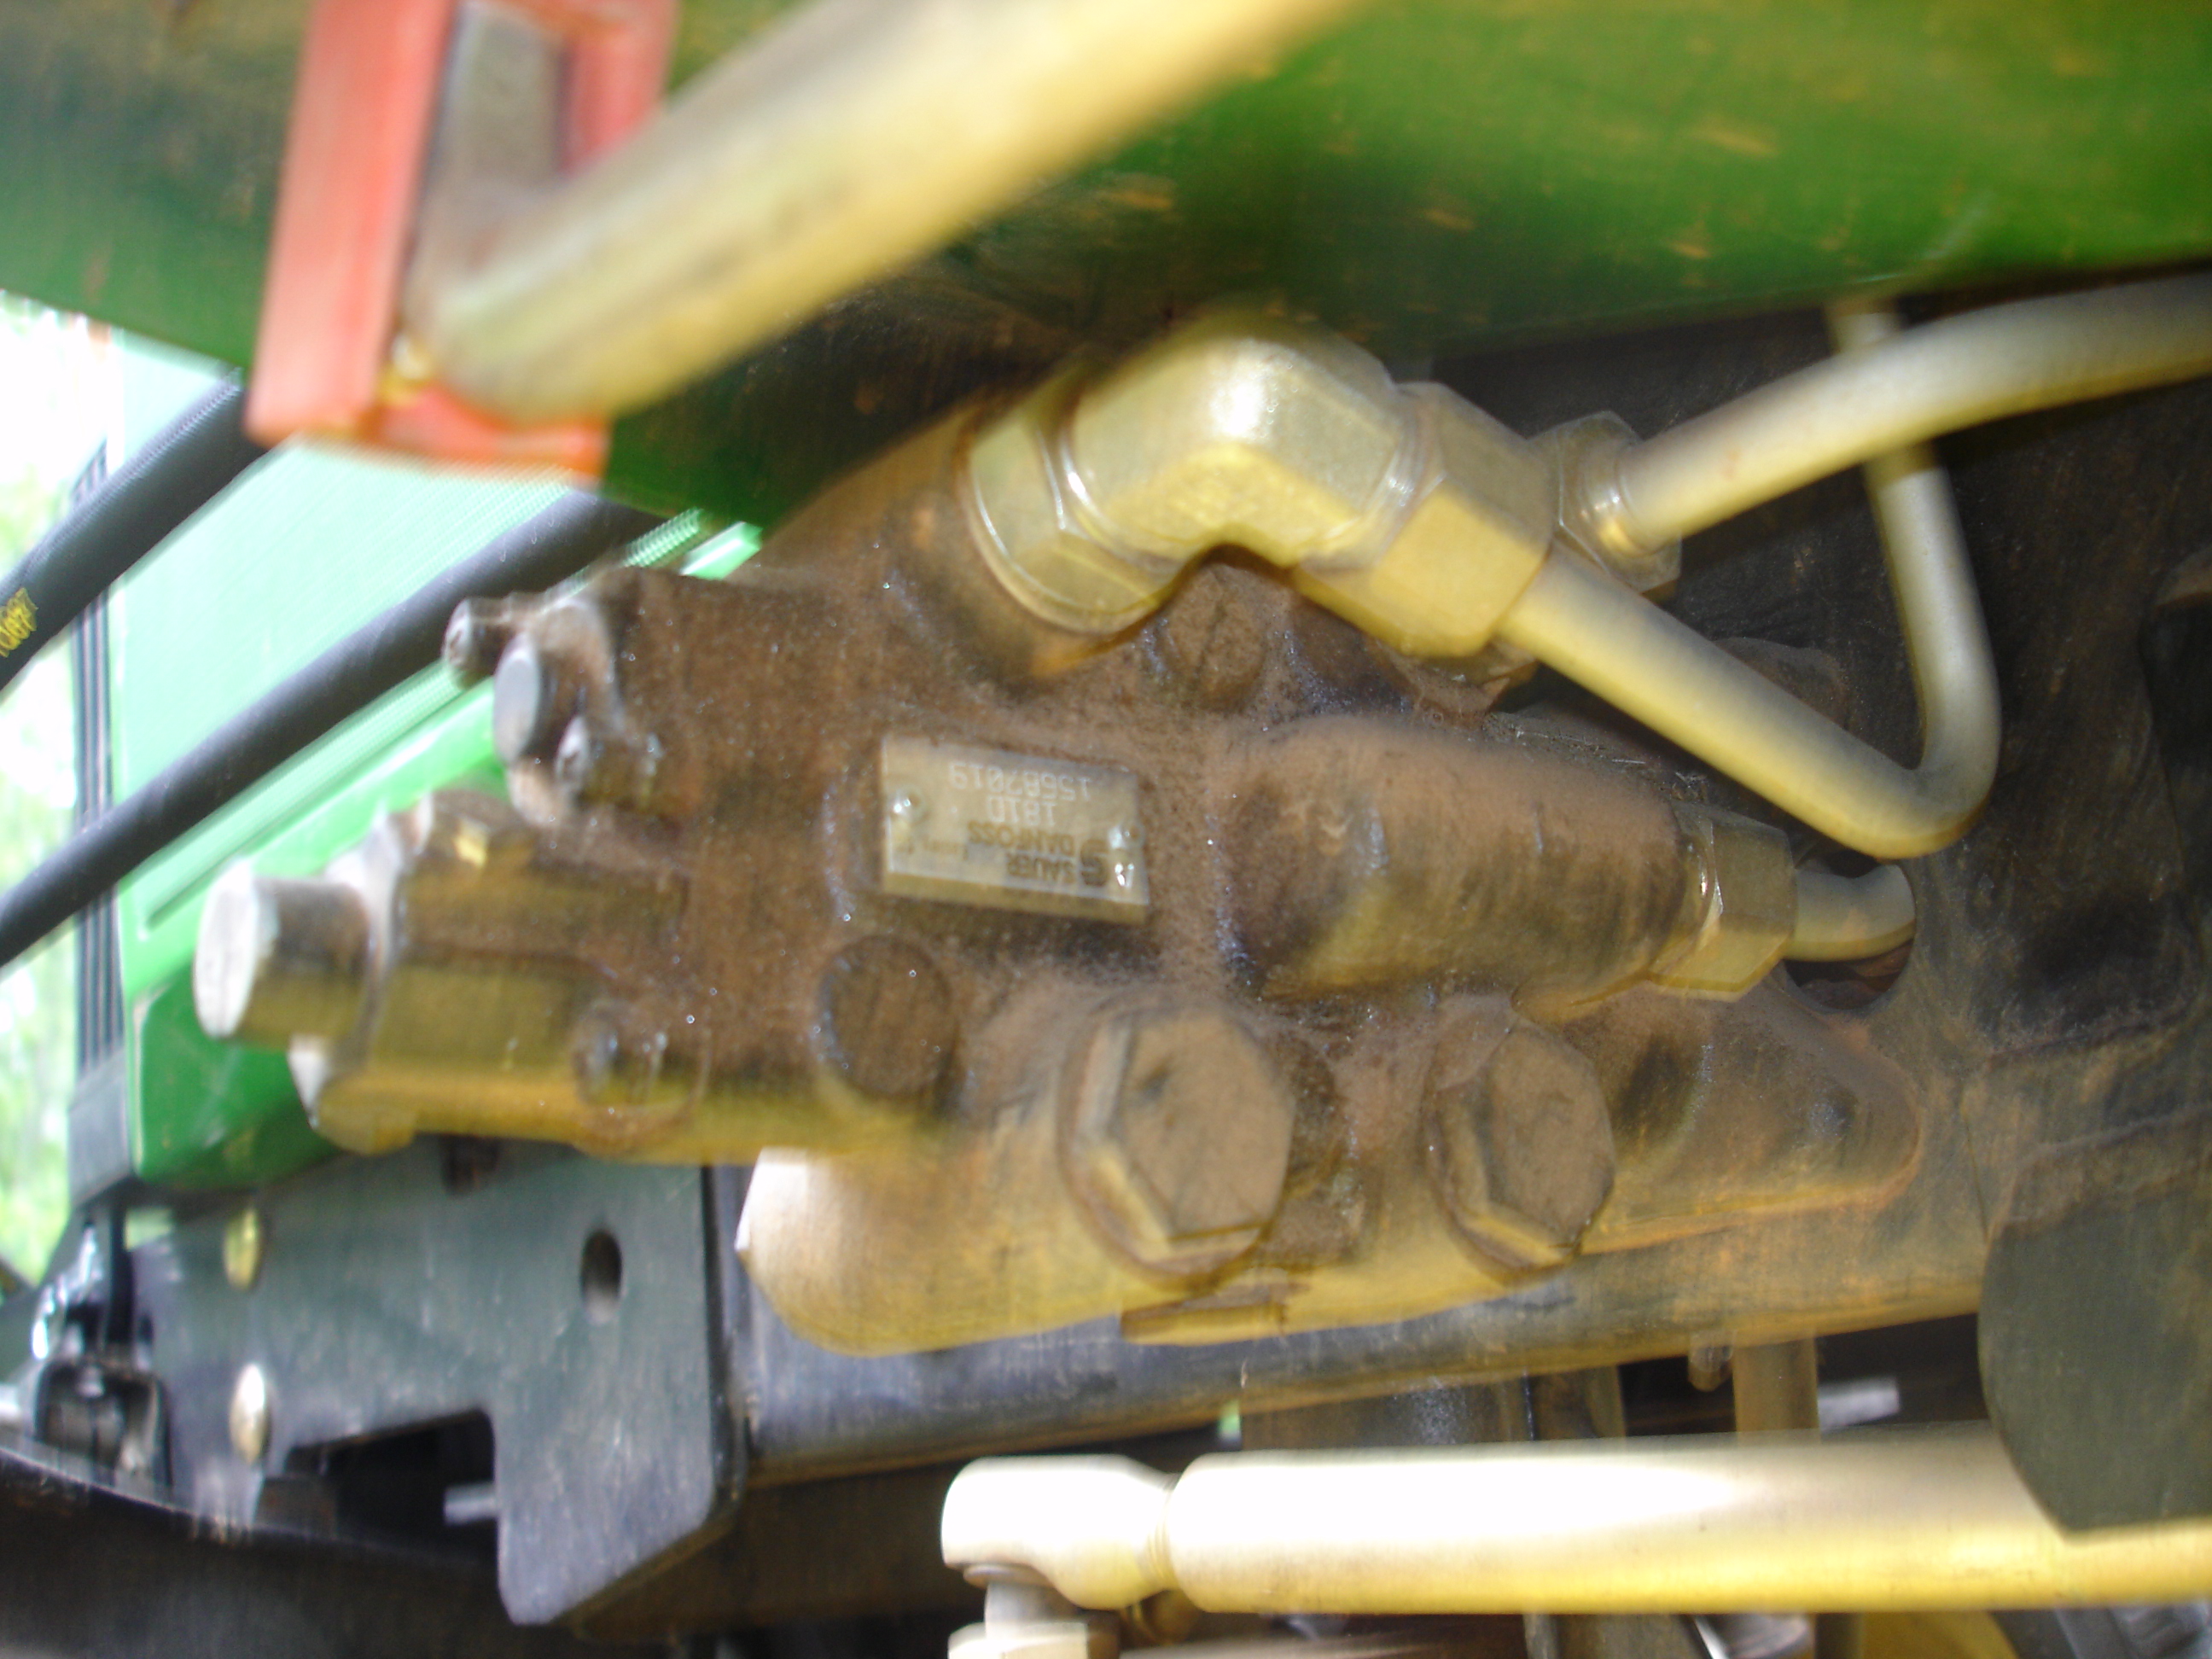
Now, my issue that I'm sure is unique to me. Even before I purchased
the JBSr. I noticed that the mowing deck would slowly lower over time.
Once I installed the lift
cylinder lockout valve (photo 3/4 above) I was able to really see
this. I raised the mower deck all the way to the top, then close
this valve. This should seal the mower deck hydraulic
circuit. With this circuit closed, the deck should not move.
But, mine still slowly lowers. I can only assume that fluid is
bypassing inside the hydraulic cylinder allowing the deck to
lower. For now, when it gets too low, I just open the valve, raise
it again and then close the valve. |
|
|
|
|
|
|
|
|
|
|
Revised: August 05, 2007
|